ニュース&ガイド
All Stratagem Inputs In Helldivers 2

Patriotic Administration Center Stratagems
Stratagem Basics and Input System
Patriotic Administration Center Stratagems are primarily unlocked by earning Requisition Slips through completing Major Operations. Each Stratagem has a unique input code, which needs to be entered using directional commands while holding L1 (PlayStation) or Ctrl (PC) on the battlefield. A successful input generates a beacon, which can be thrown to the desired location to summon the equipment.
The input code consists of a series of directional commands, for example, “Down, Left, Down, Up, Right” represents the Heavy Machine Gun. These codes may look complex, but most have an underlying logic. For instance, many of the Patriotic Administration Center weapon codes start with “Down, Left,” and familiarity with this pattern can help you master the input commands for the entire arsenal faster.
Table: Complete List of Patriotic Administration Center Stratagems
Weapon Details and Tactical Applications
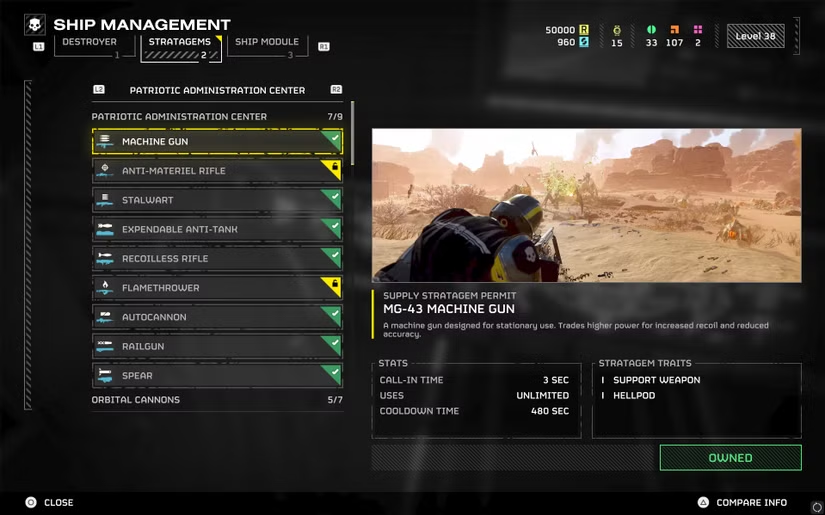
The Heavy Machine Gun (Code: Down, Left, Down, Up, Right) is an early-game unlock multi-purpose support weapon. It provides sustained fire, suitable for dealing with swarms of light armor enemies, but has slower movement speed and longer reload time. Best used for static defense in defense missions or providing fire cover for advancing teammates.
The Anti-Materiel Rifle (Code: Down, Left, Right, Up, Down) is designed for long-range precision strikes. It can one-shot most light armor enemies and has some penetration capability against medium armor. Suitable for use on open maps, especially effective against the Automaton faction’s ranged units. Its drawback is limited capability against multiple targets at close range.
The Stalwart Machine Gun (Code: Down, Left, Down, Up, Up, Left) is similar to the Heavy Machine Gun but has a faster fire rate and better mobility. It is suitable for mobile combat requiring high fire output, a balanced choice between a primary weapon and a heavy machine gun. Its relatively fast reload speed makes it more practical in dynamic combat.
The Expendable Anti-Tank (Code: Down, Down, Left, Up, Right) is one of the shortest cooldown anti-armor options in the game (only 70 seconds). Each summon provides two rockets, which can be used individually or shared with a teammate. Although the damage per shot is lower than dedicated anti-tank weapons, the short cooldown means you can use it more frequently to deal with sudden armored threats.
The Recoilless Rifle (Code: Down, Left, Right, Right, Left) is the primary anti-armor platform for team play. Its unique feature is the requirement of a dedicated backpack for ammunition, and reload speed is significantly increased with teammate assistance (from 5 seconds to about 0.5 seconds). This weapon is suitable for a dedicated anti-armor role and is especially important in high-difficulty missions.
The Flamethrower (Code: Down, Left, Up, Down, Up) is a specialized weapon against Terminids. It sustains burning and ignites an area, effectively controlling enemy movement. It excels in confined spaces like Bug Holes, capable of attacking multiple targets simultaneously. Drawbacks include limited range and poor effectiveness against Automatons.
The Autocannon (Code: Down, Left, Down, Up, Up, Right) is a true versatile weapon, effective against light and medium armored units, and capable of destroying fortifications and obstacles. It offers a balance of damage, fire rate, and reload time, but requires carrying a dedicated ammo backpack for reloading. Suitable as the squad’s main fire support weapon.
The Railgun (Code: Down, Right, Left, Down, Up, Left, Right) is one of the most powerful handheld weapons in the game. It has two modes: Safe Mode provides stable damage, while Unsafe Mode (activated by holding the reload button) deals massive damage but carries the risk of overload explosion. Mastering the timing of Unsafe Mode is key to high-level play, as it can eliminate top-tier threats like the Bile Titan in three shots.
The Spear Missile Launcher (Code: Down, Down, Up, Down, Down) features automatic tracking, making it the ultimate choice against ultra-heavy armored units. It can lock onto large targets like Tanks and Bile Titans, but the reload speed is extremely slow and ammunition is limited. Best used in open terrain, as obstacles may interfere with missile tracking.
Advanced Usage Techniques and Team Collaboration
Fast and accurate code input is the foundation for efficient Stratagem use. Practice inputting the codes in a safe area until it becomes muscle memory. In intense combat, the ability to quickly call in the right weapon can be decisive. Consider taping the commands for frequently used weapons next to your screen as a reference until fully mastered.
Throwing technique is equally important. The location where the Stratagem beacon is thrown determines the weapon’s drop zone, with the ideal location being easily defensible and covering key paths. Avoid summoning weapons in heavily contested enemy areas or dangerous terrain, as you may be unable to retrieve them.
Weapon specialization within a team maximizes efficiency. If one squad member specializes in anti-armor (carrying the Recoilless Rifle or Railgun), another can focus on crowd control (such as the Stalwart Machine Gun or Flamethrower). Avoid carrying redundant weapons; instead, cover a wider range of tactical needs.
Patriotic Administration Center weapons have synergy with Ship Module Upgrades. For example, relevant modules can increase the weapon’s initial ammunition capacity or reduce its cooldown time. Prioritizing upgrades for the weapons you use most frequently can significantly boost combat efficiency.
Orbital Cannon Stratagems
In ヘルダイバー2, Orbital Cannon Stratagems are the strongest fire support from the Super Destroyer, delivering devastating precision or area-of-effect strikes from orbit onto ground targets. Unlike Eagle Airstrikes, Orbital Strikes usually have longer call-in and cooldown times, but their power and area of effect are often more spectacular.
Complete List of Orbital Stratagems and Input Commands
Orbital Stratagems need to be summoned by directional key combinations, and the correct input sequence is crucial for successful use. Below is the complete list of all Orbital Cannon Stratagems and their input commands:
Table: Complete Orbital Stratagem Information Table
Orbital Stratagem Detailed Analysis and Tactical Applications
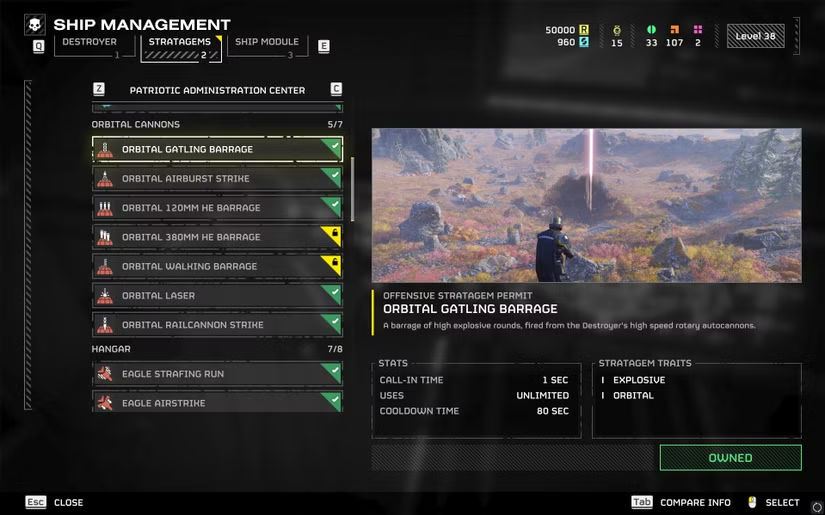
The Orbital Gatling Barrage is a versatile Stratagem available early in the game, featuring an extremely short call-in and cooldown time. It unleashes a torrent of fire from its high-speed rotating cannon onto the target area, lasting about 10 seconds. While the damage per shot is moderate, its high rate of fire makes it effective against light armor units and medium armored targets. Upgrading the “Additional Battery” Ship Module can extend its firing duration.
The Orbital Airburst Strike is an highly effective option for clearing groups of infantry, with deadly shrapnel raining down over a wide area after the aerial explosion. The input command is extremely simple (only three directional keys), allowing for quick summoning in emergencies. The drawback is its limited effect against heavy armored units; it’s best used against Automaton infantry and small Terminid units.
The Orbital 120MM HE Barrage provides accurate fire coverage, suitable for striking concentrated enemies within a small range. It randomly fires 15 high-explosive shells onto the target area, effective against light to medium armor. Although described as “accurate,” its impact points still have a high degree of randomness, so it’s best used to attack static positions or large groups of targets.
The Orbital 380MM HE Barrage is one of the most destructive Stratagems in the game, capable of conducting a prolonged bombardment over a large area. Due to its extremely wide coverage and a long call-in time of 5 seconds, it must be used while ensuring teammates are outside the affected zone. It is most suitable for destroying large enemy bases or dealing with extremely dense enemy waves.
The Orbital Walking Barrage creates a linear wall of fire that advances forward, effectively flushing enemies out of cover. This Stratagem is particularly useful during offensive pushes or defensive retreats, creating a safe path forward for the team. The barrage moves forward at fixed intervals, lasting about 30 seconds.
The Orbital Laser is one of the most unique Stratagems in the game, emitting a continuous laser beam lasting 25 seconds that automatically prioritizes the most dangerous targets nearby. It is one of the few Stratagems that can destroy any enemy, from cannon fodder to the most heavily armored targets. The drawback is its limited use to 3 times per mission, and a long cooldown of 5 minutes.
The Orbital Railcannon Strike employs an automatic targeting mechanism, locking onto the largest target near the beacon and firing an ultra-high-velocity shell. It can one-shot most heavy armored units, such as Chargers, Hulks, and Tanks (excluding Bile Titans and Factory Striders). Since it takes effect immediately after being called in, it is particularly valuable in emergency situations.
Advanced Usage Techniques and Team Coordination
Proficiency in input commands directly affects combat efficiency. Practice inputting the commands in a safe area until it becomes muscle memory, allowing for quick deployment in intense combat. Note that some planetary effects may interfere with input, such as “Input Scramble” which can randomly invert directional commands.
The impact point of Orbital Stratagems is related to the Super Destroyer’s position. The Destroyer hovers 1000 meters above the map center, meaning that when called in near the center of the map, the strike will fall vertically; when called in near the map edge, the strike will fall at an angle.
Team communication is crucial to avoiding friendly fire. Before using large-area strikes like the 380MM HE Barrage, be sure to notify teammates and ensure they have enough time to evacuate the affected area. Ideally, the team should designate one player to specialize in Orbital Strikes, while others focus on different types of support.
Choosing the appropriate Stratagem for different enemies significantly increases efficiency. Against Terminids, the Orbital Laser and Orbital Gatling Barrage are effective for dealing with large numbers of small units; against Automatons, the Orbital Railcannon Strike and Orbital Airburst Strike are more practical, capable of precisely eliminating heavy armor units or clearing infantry groups.
Ship Module Upgrades can enhance the effectiveness of Orbital Stratagems. The “Zero-G Reload System” module can reduce the cooldown of Orbital Stratagems by 10%, while the “Targeting Software Upgrade” can reduce the call-in time by 1 second.
From Call-in Command to Tactical Application

Complete List of Hangar Stratagems and Input Commands
Hangar Stratagems need to be summoned by directional key combinations, and the correct input sequence is crucial for successful use. Below is the complete list of all Hangar Stratagems and their input commands:
Table: Complete Hangar Stratagem Information Table
Stratagem Detailed Analysis and Tactical Applications
The Eagle Strafing Run is a versatile Stratagem unlocked early in the game, featuring extremely short cooldown and call-in times. The fighter jet flies low and fires its cannon, dealing continuous damage to enemies in a straight line. Although the damage per use is moderate, its high rate of fire and fast cooldown allow for frequent use, effectively dealing with swarms of light armor enemies.
The Eagle Airstrike is the ideal choice for covering a wide area, dropping multiple bombs onto the target area, causing widespread explosive damage. The input command is relatively simple (only four directional keys), making it highly effective when engaging medium enemy groups. The drawback is that bomb impact points have some randomness, so it is best used to attack static positions or slow-moving groups of targets.
The Eagle Cluster Bomb offers a unique attack pattern, with bombs splitting into multiple small warheads in the air, providing wider coverage but lower individual damage per point. It is suitable for dealing with dispersed small to medium-sized enemies, especially infantry units of the Automaton faction. The Cluster Bomb has a moderate cooldown, allowing for multiple uses in one battle.
The Eagle Napalm Airstrike is the expert in area control and sustained damage. It creates a field of fire in the target area, inflicting continuous damage on enemies passing through and effectively impeding enemy movement.
Tactical Tools and Mobility Gear
The Jump Pack is a revolutionary piece of equipment that changes the way you move. It allows players to perform short-distance flights, clearing obstacles or reaching high ground. In complex terrain, the Jump Pack helps you quickly reposition, evade enemy encirclement, or gain a better firing angle. More importantly, you do not take fall damage when jumping, allowing for safe descent from high places.
The Eagle Smoke Strike is a powerful tool for tactical retreat and cover. It generates thick smoke in the target area, obscuring enemy vision and creating opportunities for you and your teammates to evacuate or reposition. Smoke is particularly effective against the Automaton faction, disrupting their targeting systems.
The Eagle 110MM Rocket Pods provide precise heavy armor strike capability. It launches multiple rockets, delivering concentrated damage to targets within a small area.
The Eagle 500KG Bomb is one of the most powerful single-damage abilities in the game, capable of one-shotting most elite units, including the Bile Titan.
Advanced Usage Techniques and Team Collaboration
Proficiency in input commands directly affects combat efficiency. Eagle Stratagem codes usually start with “Up, Right,” and familiarity with this pattern can help you master the entire series faster. Practice in a safe area until it becomes muscle memory, allowing for quick deployment in intense combat.
The unique cooldown mechanism of Eagle Stratagems is based on the number of uses rather than a traditional cooldown time. Each Eagle Stratagem has a fixed number of uses, after which it requires a period of rearming, instead of waiting for a cooldown countdown. This means you can use the same Stratagem multiple times consecutively, followed by a longer rearm time.
Team communication is key to maximizing the effectiveness of Eagle Stratagems. Before using large-area attacks like the 500KG Bomb, be sure to notify teammates and ensure they have enough time to evacuate the affected area. Ideally, the team should coordinate the timing of different Stratagems to create continuous fire support.
Choosing the appropriate Stratagem for different enemies significantly increases efficiency. Against Terminids, the Eagle Napalm and Cluster Bomb are effective for dealing with large numbers of small units; against Automatons, the Eagle 110MM Rocket Pods and 500KG Bomb are more practical, capable of precisely eliminating heavy armor units.
Ship Module Upgrades and Stratagem Optimization
Hangar-related Ship Module Upgrades can significantly enhance the effectiveness of Eagle Stratagems. The “Liquid-Ventilated Cockpit” module can reduce the cooldown of all Eagle Stratagems by 50%, which is one of the most valuable upgrades. Other relevant modules can increase the number of uses for Eagle Stratagems or reduce the call-in time.
Prioritize upgrades related to your most frequently used Eagle Stratagems. If you rely on the Eagle Airstrike for area clearing, investing in cooldown reduction modules is wise. If you primarily use the Eagle 500KG Bomb against elite enemies, you might consider modules that increase damage or blast radius.
From Orbital Strikes to Fortifications
In ヘルダイバー2, Bridge Stratagems are crucial tactical support from the Super Destroyer, offering a mix of precise orbital strikes and powerful fortifications that can turn the tide of battle in critical moments. Unlike the direct fire support of the Patriotic Administration Center or the destructive power of the Hangar’s Eagle Airstrikes, the options provided by the Bridge focus more on tactical and area control.
Complete List of Bridge Stratagems and Input Commands
Bridge Stratagems need to be summoned by directional key combinations, and the correct input sequence is crucial for successful use. Below is the complete list of all Bridge Stratagems and their input commands:
Table: Complete Bridge Stratagem Information Table
Stratagem Detailed Analysis and Tactical Applications
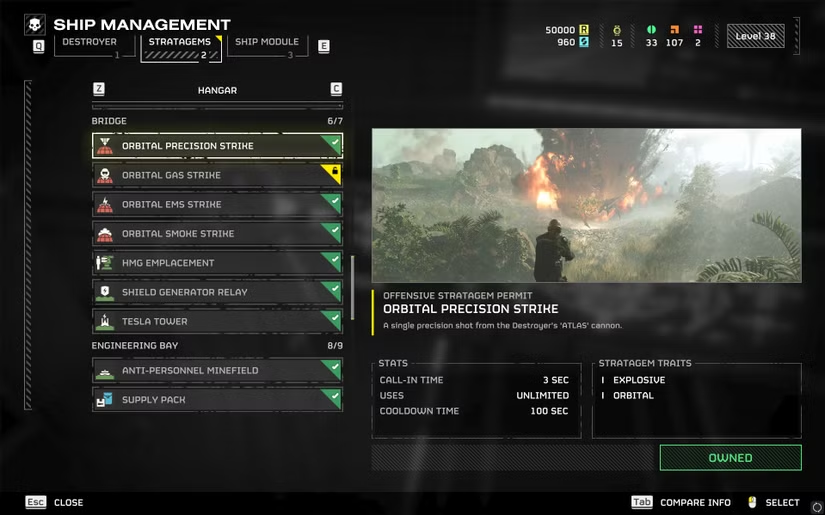
The Orbital Precision Strike is the most reliable single-point destruction tool available early in the game. Although the call-in time is 4 seconds, its extremely high damage accuracy makes it ideal for dealing with heavy armored units or destroying specific objectives. Upgrading relevant Ship Modules can shorten its call-in time, allowing you to gain support faster in emergencies.
The Orbital Gas Strike creates a sustained gas cloud in the target area, inflicting continuous damage on enemies passing through. It is particularly suitable for blocking corridors or controlling enemy movement paths.
The Orbital EMS Strike is one of the most powerful control abilities in the game, releasing a static charge that stuns all enemies within its radius. This creates a valuable damage-dealing window for you and your teammates, and is extremely effective against fast-moving enemies like Terminids.
The Orbital Smoke Strike provides tactical cover, obstructing enemy vision and allowing you to move safely or reposition. It is particularly useful during extraction missions or when stealth is required to approach an objective.
Fortifications and Team Support Equipment
The Heavy Machine Gun Emplacement is a fixed fire point, providing sustained high-damage output. It is suitable for defense missions or situations requiring a fixed position to be held, but deployment position needs careful selection—it should cover key paths while avoiding easy destruction by enemies.
The Shield Generator Relay creates a large-area energy shield bubble that deflects incoming projectiles. This is ideal equipment for protecting important objectives or team gathering points, and is particularly effective against the ranged attacks of the Automaton faction.
The Tesla Tower is an automatic defense facility that releases electric arcs towards approaching enemies. It is best deployed in narrow corridors or choke points, effectively controlling enemy movement. Be aware that the Tesla Tower does not distinguish between friend and foe, and teammates who get too close will also take damage.
Advanced Usage Techniques and Team Coordination
Proficiency in input commands directly affects combat efficiency. Bridge Stratagem codes usually start with “Right, Right” (Orbital class) or “Down, Up” (Fortification class), and familiarity with this pattern can help you master the entire series faster.
The selection of Stratagem drop location is crucial. Orbital Strikes need to consider the Super Destroyer’s position—when called in near the map center, the strike will fall vertically; when called in near the map edge, the strike will fall at an angle. This affects the accuracy and arrival time of the strike.
Team communication is key to avoiding friendly fire. Before using large-area control abilities like the Orbital EMS Strike, be sure to notify teammates and ensure they have enough time to evacuate the affected area. Ideally, the team should coordinate the timing of different Stratagems to form a continuous chain of control and damage.
Choosing the appropriate Stratagem for different enemies significantly increases efficiency. Against Terminids, the Orbital EMS Strike and Tesla Tower are effective for dealing with large numbers of melee units; against Automatons, the Orbital Precision Strike and Shield Generator Relay are more practical, capable of precisely eliminating heavy armored units or defending against ranged attacks.
Ship Module Upgrades and Stratagem Optimization
Bridge-related Ship Module Upgrades can significantly enhance Stratagem effectiveness. The relevant modules can reduce the cooldown or call-in time of Stratagems, allowing you to use these powerful tools more frequently.
Prioritize upgrades related to your most frequently used Stratagems. If you rely on the Orbital Precision Strike for precise demolition, investing in modules that reduce the call-in time is wise.
From Fortifications to Support Gear
In ヘルダイバー2, Engineering Bay Stratagems are your core tools for building battlefield control capabilities. Unlike the direct fire support of the Patriotic Administration Center or the destructive power of Orbital Strikes, the equipment provided by the Engineering Bay focuses more on area control, team support, and sustained combat capability.
Fortifications and Area Control Equipment
The Anti-Personnel Minefield (Input Code: Down, Left, Up, Right) is the most basic area denial tool from the Engineering Bay. It deploys multiple mines in the designated area, dealing fatal damage to enemies that pass through. Best deployment locations include Bug Hole exits, around Automaton drop zones, and on the approach paths to mission objectives. When deploying, ensure the minefield covers the entire width of the corridor to prevent enemies from circumventing it. Note that mines are equally effective against teammates, so be sure to mark the area after deployment.
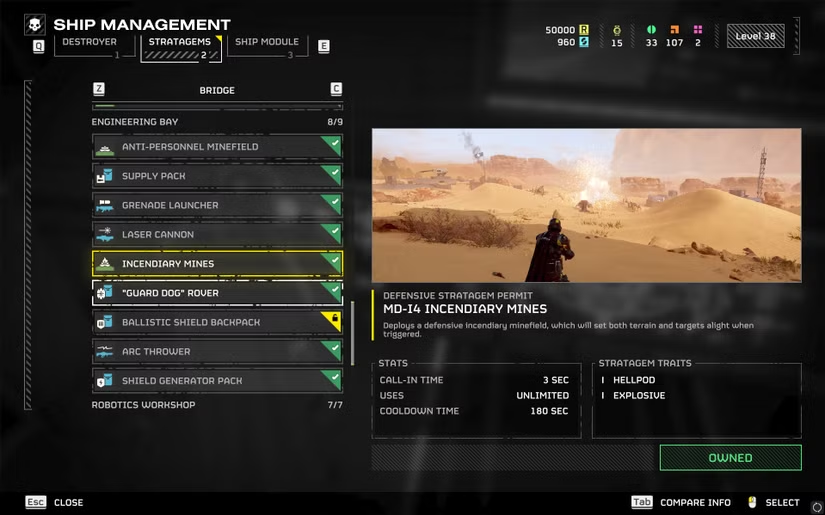
The Incendiary Mines (Input Code: Down, Left, Left, Down) offer a different tactical effect than conventional explosive mines. The flame area they create inflicts continuous damage and impedes enemy movement, making them particularly suitable for engaging melee-focused enemies like Terminids. The flames from Incendiary Mines can block line of sight and cause sustained damage, making them a valuable asset for defense missions. Deploying them in narrow corridors or around objective points can create safe defensive zones.
Table: Complete Engineering Bay Stratagem Information Table
Support Backpacks and Team Survival Gear
The Supply Pack (Input Code: Down, Left, Down, Up, Up, Down) is key to the team’s sustained combat capability. The wearer can dispense ammunition and stims to teammates, greatly extending the squad’s time on the battlefield. The backpack holds four ammo pouches and can be replenished from a Supply Stratagem pod. In high-difficulty missions, at least one player carrying the Supply Pack can significantly boost team survival.
The Shield Generator Pack (Input Code: Down, Up, Left, Right, Left, Right) is one of the most valuable survival gear pieces in the game. It generates an energy shield around the user, absorbing damage and preventing stagger effects. The shield automatically recovers after a brief period of not taking damage, providing continuous protection. In high-difficulty missions, the Shield Generator Pack can protect you from Automaton rockets and heavy Terminid hits, and even withstand accidental friendly fire from Stratagems.
The Ballistic Shield Backpack (Input Code: Down, Left, Up, Up, Right) provides frontal ballistic protection, allowing you to shoot with a single-handed weapon while covered. Although its protection is not as comprehensive as the Shield Generator Pack, it doesn’t occupy the arm slot, allowing you to use your primary weapon while maintaining defense.
Special Weapons and Energy Gear
The Laser Cannon (Input Code: Down, Left, Down, Up, Left) is an unlimited-ammo energy weapon that operates by accumulating heat instead of consuming ammunition. It received enhancements in patch 01.000.100, now dealing more damage to heavy armor sections and having higher armor penetration. The Laser Cannon requires heat management skills—sustained fire leads to overheating, requiring a cease-fire to cool down. Ideally, use short bursts instead of sustained fire to maximize damage while avoiding overheating downtime. It is particularly effective against heavy armored enemies like Hulks, Chargers, and Bile Titans.
The Arc Thrower (Input Code: Down, Right, Up, Left, Down) is a unique area control weapon; the electric arc it fires can jump between multiple targets, delivering devastating damage to tightly clustered enemy groups. The charged arc can penetrate light cover, making it effective against enemies behind cover. The Arc Thrower is particularly suitable for dealing with swarms of small enemies, such as Terminid warrior groups or Automaton infantry. When using it, be aware that the arc can also harm teammates, so ensure a clear line of fire without friendly forces on the target line.
The Grenade Launcher (Input Code: Down, Left, Up, Left, Down) provides explosive area damage, suitable for clearing swarms of small enemies and destroying Bug Holes. It fires high-explosive grenades that detonate on impact, damaging all targets within a certain radius. The Grenade Launcher has two magazines and can be reloaded via the Supply Pack or Supply Stratagem. Compared to the Autocannon, the Grenade Launcher is easier to use but has lower single-shot damage, making it suitable for threats below medium armor.
Automated Guard and Drone Systems
The Guard Dog Rover (Input Code: Down, Up, Left, Up, Right, Right) is your personal AI companion. This drone follows you and automatically attacks nearby enemies. The Rover version uses a laser weapon, which is quiet and accurate, suitable for stealth operations or dealing with dispersed small enemies. The drone has an independent usage time limit, requiring a cooldown after use. Once deployed, it automatically follows and protects you, allowing you to focus on the main objective without harassment from small enemies.
The biggest advantage of the Guard Dog Rover is its automated operation—you don’t need to control it; it automatically identifies and attacks threats. This allows you to focus on higher-priority tasks, such as eliminating heavy armored enemies or completing objectives. The drone is especially suitable for scout roles, providing early warning of approaching enemies and offering additional fire support.
Tactical Combinations and Advanced Usage Techniques
The true power of Engineering Bay gear lies in their synergy. For example, the combination of the Laser Cannon and Shield Generator Pack makes you a durable frontline fire point, capable of absorbing damage while maintaining continuous output. The combination of the Arc Thrower and Supply Pack ensures you have ample resources to handle large-scale enemy groups.
Proficiency in input commands directly affects battlefield reaction speed. Engineering Bay Stratagem codes are often longer and require repeated practice to develop muscle memory. Practice inputting in a safe area until you can quickly and accurately summon the required gear under pressure. Consider taping the commands for frequently used gear next to your screen as a reference until fully mastered.
Specialization of gear within a team maximizes the value of Engineering Bay equipment. If one player specializes in area control (carrying a Minefield), another can focus on direct support (carrying a Supply Pack). Avoid carrying redundant gear; instead, cover a wider range of tactical needs. Communicate the timing and location of Stratagem use to ensure the team can collaboratively maximize effectiveness.
Adjusting Engineering Bay gear selection for different enemy factions is crucial. Against Terminids, Incendiary Mines and the Arc Thrower are effective for dealing with large numbers of melee units; against Automatons, the Shield Generator Pack and Laser Cannon are more practical, capable of defending against ranged attacks and penetrating heavy armor.
Robotics Workshop Stratagems
Complete List of Robotics Workshop Stratagems and Input Commands
Robotics Workshop Stratagems need to be summoned by directional key combinations, and the correct input sequence is crucial for successful use. Below is the complete list of all Robotics Workshop Stratagems and their input commands:
Table: Complete Robotics Workshop Stratagem Information Table
Sentry System Detailed Analysis and Tactical Applications
The Machine Gun Sentry is a basic defense facility unlocked early in the game, featuring a shorter cooldown time (only 120 seconds), allowing for quick deployment to respond to sudden situations. It uses a medium rate-of-fire machine gun to attack enemies within range, suitable for dealing with unarmored and lightly armored units. Although the single-shot damage is moderate, the sustained fire output can effectively suppress small enemy groups.
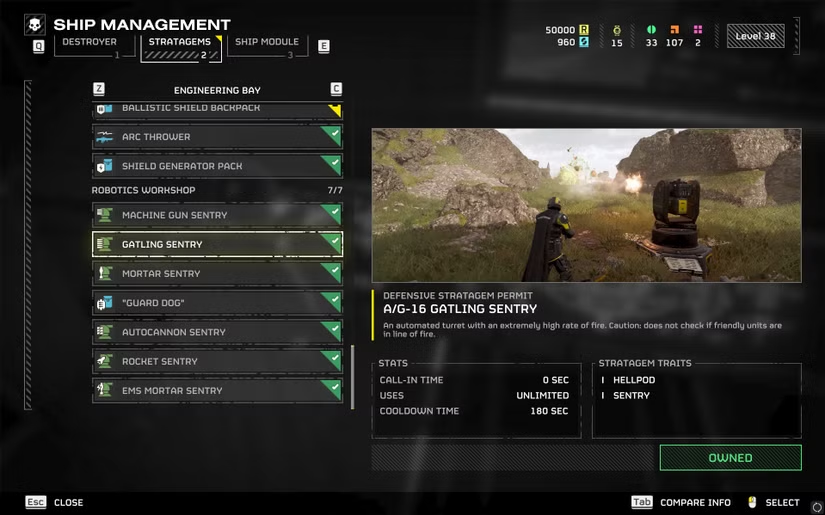
The Gatling Sentry is the fastest-firing Sentry in the Robotics Workshop, capable of delivering devastating damage to light armored enemies. With a 180-second cooldown, it is suitable for deployment in densely populated enemy areas or on critical paths. It’s important to note that the Gatling Sentry’s firing does not distinguish between friend and foe, so deployment should ensure its firing arc does not cover frequently used paths for teammates.
The Mortar Sentry provides unique indirect fire support, capable of attacking targets out of line of sight. The mortar shells it fires travel in a parabolic arc, allowing them to hit enemies behind cover. This Sentry is particularly suitable for defense missions, as it can be deployed in advance in a safe location to continuously bombard incoming enemies. However, be aware that the mortar shells’ impact points have some randomness and may accidentally injure teammates close to the enemy.
The Autocannon Sentry is the ideal choice for dealing with medium armored units. The armor-piercing shells it fires can effectively penetrate the armor of Automatons and the medium units of the Terminids. The Autocannon Sentry has a longer range and higher accuracy, but requires a clear line of sight to be effective. When deploying, choose a location that covers a wide area and avoids being blocked by terrain.
The Rocket Sentry fires straight-flying rockets, dealing damage to all enemies along its path. It is particularly suitable for deployment in narrow corridors or canyons, maximizing the effectiveness of the rockets. The Rocket Sentry’s attack can penetrate multiple targets, making it especially effective against dense enemy groups.
The EMS Mortar Sentry is the most powerful control-type Sentry in the game. The electromagnetic pulse shells it fires stun enemies within its radius, temporarily incapacitating them. While the damage itself is low, using it in conjunction with other offensive Sentries can produce devastating effects. For example, combining the EMS Mortar Sentry with a regular Mortar Sentry can first control the enemies and then eliminate them with concentrated fire.
Guard Dog Drone: Your Personal Combat Companion
The Guard Dog Drone is unique equipment provided by the Robotics Workshop, an automatically following drone that offers 360-degree protection. Once deployed, it flies continuously by your side, automatically attacking approaching enemies. The Guard Dog uses a medium-penetration assault rifle, effectively dealing with light and medium armored enemies.
The Guard Dog’s greatest advantage is its automated mode of operation—you do not need to control it; it automatically identifies and attacks threats. This allows you to focus on higher-priority tasks, such as eliminating heavy armored enemies or completing objectives. The Guard Dog is particularly suitable for scout roles, providing early warning of approaching enemies and offering additional fire support.
It is important to note that the Guard Dog’s attack may reveal your position. When you are attempting a stealth approach to an objective, the Guard Dog might proactively engage enemies, compromising your stealth plan.
Advanced Deployment Techniques and Team Coordination
The placement of Sentries directly determines their effectiveness. The ideal location should have the following characteristics: high ground advantage (providing a better field of fire), cover critical paths, provide natural cover to protect the Sentry itself, and be away from teammates’ common paths to avoid friendly fire. For instance, in a defense mission, deploying the Sentries on high ground around the objective maximizes their fire coverage.
Coordinated Sentry deployment can achieve a 1+1>2 effect. A classic combination is the EMS Mortar Sentry paired with a regular Mortar Sentry: the former stuns enemies, and the latter capitalizes on the enemies’ immobility to deliver precise bombardment. This combination is highly effective in dealing with large-scale enemy assaults in defense missions.
Another effective combination is Sentries with different ranges: deploy the Gatling Sentry (close range) and the Autocannon Sentry (medium to long range) together to form a layered defense system. The Gatling Sentry focuses on clearing approaching light enemies, while the Autocannon Sentry focuses on medium armored targets.
Sentry specialization within a team maximizes defensive effectiveness. If multiple squad members carry Sentries, they should coordinate different types of combinations to avoid redundancy. For example, one player carries a control-type Sentry (like the EMS Mortar), and another carries an offensive-type Sentry (like the Rocket Sentry), forming a more comprehensive defense system.
Efficient Input Command Memorization Methods
Although the input commands for Robotics Workshop Stratagems may seem complex, there is an underlying pattern to be found. Most commands start with “Down, Up,” followed by a unique sequence for the specific equipment. By understanding this pattern, you can master all the commands faster.
The chunking method is very effective: break down complex commands into small parts for memorization. For example, the “Guard Dog” command “Down, Up, Left, Up, Right, Down” can be chunked into “Down-Up-Left” and “Up-Right-Down.” First, practice the coherence of each chunk, then combine them into the full command.
Practice in live situations is key. Practice inputting the commands repeatedly in the safe zone on the Super Destroyer until it becomes muscle memory. Given the difficulty of accurately inputting commands during intense combat, proficiency directly affects combat efficiency. Some players find that creating mnemonic images can accelerate memorization, such as inventing a short story or associated image for each command.
Ship Module Upgrades and Tactical Optimization
Robotics Workshop-related Ship Module Upgrades can significantly enhance Sentry effectiveness. For example, the “Shock Absorption Gel” module can increase the ammunition capacity of all Sentries by 50%, which is one of the most valuable upgrades.
Prioritize upgrades related to your most frequently used Sentries. If you rely on the Mortar Sentry for area control, investing in modules that increase ammunition capacity is wise. If you primarily use the Gatling Sentry to deal with light enemies, consider modules that reduce the cooldown time.
Sentry effectiveness is closely related to game difficulty. At low to medium difficulty levels, Sentries can effectively handle most threats. However, at high difficulties (such as Helldive difficulty), the enemy numbers and armor levels significantly increase, and Sentries may require more support to be effective.
From Reinforcement Call-in to Hellbomb
Mission Stratagem Details and Input Commands
The input command for the SOS Beacon is Up, Down, Left, Up. It is used not only to fill the squad when teammates are scarce, but also to significantly speed up the Super Destroyer’s arrival when activated at the extraction point. After successful deployment, the beacon emits a visible signal, and teammates join the battle via Hellpods. Note that the beacon may attract enemy attention while active, so ensure the area is secure or have teammates provide cover.
The command for Resupply is Down, Down, Up, Right, a lifeline on the battlefield. It provides a full resupply of ammunition, stims, and grenades. The Resupply pod takes about 5 seconds to land, so ensure the location is safe and easily accessible to teammates when calling it in. If a team member is carrying a Supply Pack, picking up a Resupply pod also replenishes the backpack’s inventory, maximizing resource utilization.
The command for Reinforce is Up, Down, Right, Left, Up, used to revive fallen teammates. The fallen player can choose a new drop zone, and the Hellpod can deal damage to enemies upon landing. The team shares a limited number of reinforcements, so use them judiciously at high difficulty levels. Successfully reviving all squad members yields bonus experience.
The input command for the Hellbomb is relatively complex: Down, Up, Left, Down, Up, Right, Down, Up. It is primarily used to destroy large objectives such as Illegal Broadcast Stations or ICBM Launch Sites. Once placed, it requires a short activation time, during which enemy attacks must be repelled. The Hellbomb’s explosion radius is very large, so maintain a safe distance.
Timing and Strategy Analysis
The effectiveness of Mission Stratagems is highly dependent on timing. Pre-deploy Resupply pods in the primary objective area to ensure the team enters combat with optimal resources. The Resupply cooldown is long (480 seconds), so avoid wasting it when resources are sufficient.
The timing of Reinforcement directly affects mission success or failure. If multiple teammates are down simultaneously, a single Reinforce can bring everyone back, conserving reinforcement uses. During the extraction phase, sometimes completing the mission is wiser than risking reviving teammates.
The Hellbomb’s placement requires careful selection. The ideal location should maximize the destruction effect while providing favorable terrain for defense. Complex input commands can be prone to error under pressure, so practice beforehand to develop muscle memory.
Team Collaboration and Stratagem Synergy
- Mission Stratagems are a catalyst for team collaboration. Clear roles enhance efficiency—for example, designate one person to call in Reinforcement and another to manage Supply distribution.
- Mission Stratagem synergy with regular Stratagems can be highly effective. When placing the Hellbomb, using Sentries or Smoke Airstrikes provides strong support for defense. Pairing the SOS Beacon with a Shield Generator can ensure the safe landing of newly joined teammates.
- Communication is key to effective use of Mission Stratagems. Use voice chat or the marking system to clearly convey intentions, avoiding redundant use or wasted resources. Clear communication is essential, especially when designating the Hellbomb placement and defense plan.
- Advanced Techniques and Special Situation Handling
- The SOS Beacon can be used as a tactical decoy. Intentionally activating the beacon far from the main objective can distract enemies, creating a window for mission execution.
- The Resupply pod’s drop point has tactical value. Its impact can eliminate enemies in its path, but it can also harm teammates, so exercise extreme caution when calling it in. The Resupply container itself can serve as temporary cover, providing limited protection in open areas.
- The Reinforce Hellpod is a multi-functional tool. Besides reviving teammates, it can be used to destroy light vehicles or create a path for a breakout. The Hellpod has visible and audible warnings before impact, which can be used to disperse grouped enemies.
- Alternative uses for the Hellbomb. In emergencies, the Hellbomb can be used as a super-explosive against large enemies like the Bile Titan, but this is a high-risk strategy that requires a clear extraction plan.
Table: Mission Stratagem Key Feature Comparison
Mission Types and Stratagem Selection
Different mission types require different Stratagem focuses. In defense missions, the importance of Resupply and Reinforce is highlighted; while in demolition missions, the successful use of the Hellbomb is more critical.
Increasing difficulty changes the value of Mission Stratagems. At high difficulties, resource management becomes more crucial, and the timing of Resupply use needs to be precisely calculated. Simultaneously, increased enemy strength and numbers make Reinforce strategy more important.
PC Version Stratagem Keybinding Changes
Detailed Steps for In-Game Keybinding
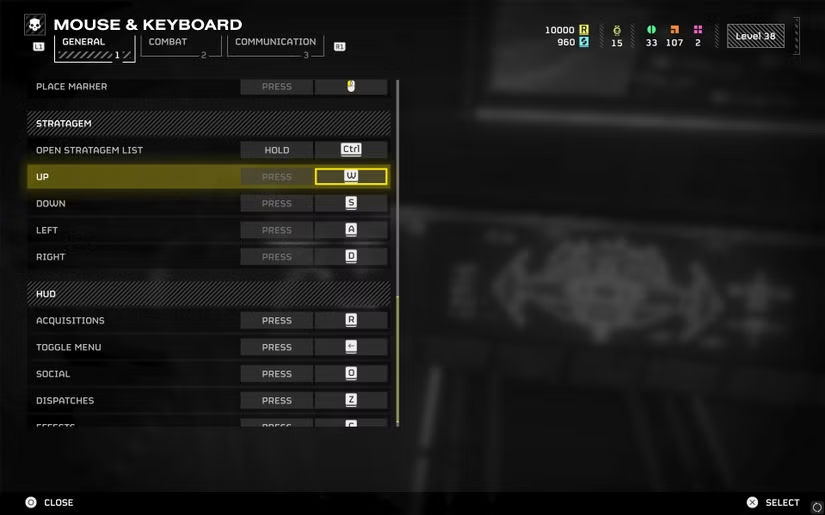
To change Stratagem keybindings, you need to enter the game’s Options menu. The specific path is: Press ESC key to open the pause menu → Select the “Options” tab at the top → Select “Mouse and Keyboard” in the left sidebar menu → Click the “Change Key Bindings” button.
In the key bindings interface, you need to find the four options related to Stratagem input: Stratagem Up, Down, Left, Right. The game defaults these functions to the W, A, S, D keys, respectively. Click the corresponding entry, then press the new key you wish to set to complete the modification.
The most recommended solution is to change the directional commands to the Arrow Keys on the keyboard (Up, Down, Left, Right). This allows you to continue using WASD for movement with your left hand, while using the Arrow Keys for Stratagem code input, achieving “call-in while moving” seamless operation.
Table: Stratagem Keybinding Modification Comparison
Practical Key Configuration and Optimization Strategy
In addition to the Stratagem directional keys, several other keybindings are worth adjusting. The Stims Quick Key is defaulted to the V key, but many players find Q key more accessible.
Another practical tip is to change the Sprint function from “Hold” to “Toggle”. In the keybindings settings, find the Sprint/Dive option and change it from “Hold Shift” to “Press Shift.” This allows you to continuously sprint by pressing once, without having to hold the key down for extended periods, effectively reducing finger fatigue.
The Mark function is defaulted to the Q key. If you have changed the Stims key to Q, consider changing the Mark function to a mouse side button (if available) or another non-conflicting key. Marking enemies and objectives is crucial for team coordination, so ensure it is easy to access.
For more advanced optimization, you can set a Quick Grenade Throw key. The game defaults to selecting the grenade first before throwing, but setting a direct throw shortcut can significantly increase reaction speed. Consider setting a mouse side button or the G key for quick grenades.
Advanced Configuration: Macros and Automation Scripts
For players looking to further optimize operational efficiency, you can use automation tools like AutoHotkey to create Stratagem macros.
The basic principle of a macro script is to simulate a sequence of key presses. For example, the Orbital Precision Strike code is “Right, Right, Up,” and the macro script will automatically press these keys in the correct order. Here is a simple example:
Important Notes: When using macro scripts, ensure that you do not press any movement keys (WASD) during the input process, as this will interrupt the input. Additionally, overly fast input (delay below 35 milliseconds) may not be recognized by the game, so it is recommended to set an appropriate delay.
Innovative Solution: Using Mobile Devices as Control Terminals
A highly innovative solution is to utilize applications like Macro Deck to turn your phone or tablet into a Stratagem control console. This method requires installing the corresponding software on both your computer and mobile device and connecting them via a local area network.
After setup, you can create custom buttons on your mobile device screen, with each button corresponding to a Stratagem. During combat, simply tap the icon on the touchscreen to call in the corresponding support in the game. The advantage of this solution is that it is intuitive and does not occupy keyboard keys, while also providing immense customization potential.
Best Practices and Practical Advice
After changing keybindings, allowing sufficient time to adapt is crucial. It is recommended to practice the new keybindings in the “Stratagem Hero” minigame on the Super Destroyer, and then move on to low-difficulty missions once familiar.
Team communication remains indispensable. Even with optimized keybindings, you should still inform teammates before using large-area offensive Stratagems (like Orbital Bombardment) to ensure their safety.
Regularly review and adjust keybindings. As your game experience increases, you may find configurations that better suit your personal habits. The game allows unlimited keybinding modifications, so feel free to experiment with different combinations to find the optimal solution.
Backup your configuration. If you have implemented complex configurations via scripts or external tools, remember to back up the relevant files to avoid losing your carefully adjusted settings after a system reinstallation or update.