ニュース&ガイド
ヘルダイバー初心者のためのヒント2
From Resource Collection to Tactical Advantage
The Core Value of Exploration and Resource Distribution
Points of Interest (POIs) scattered across the map are the primary source of resources, often containing valuable resources like Medals, Super Credits, and Samples. Unlike mission completion rewards, these resources are acquired instantly and credited to your account as soon as they are picked up.
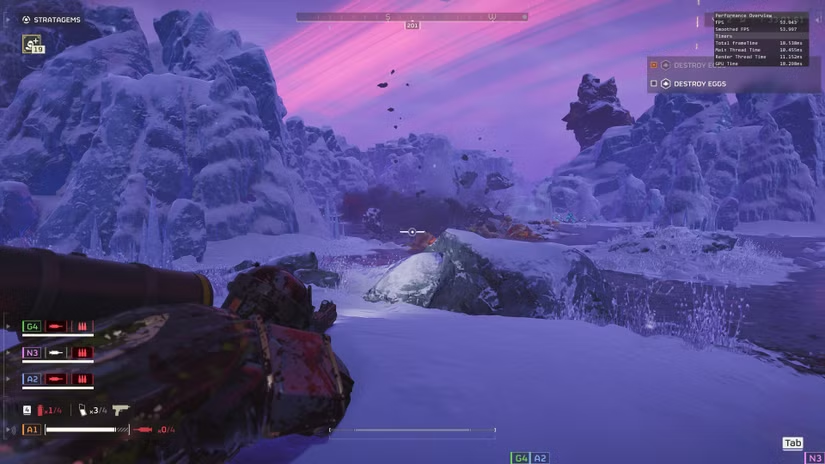
Secondary objectives provide a large amount of extra Experience and Requisition Slips, often more substantial than the time remaining bonus. Every map has at least one hidden secondary objective; completing them not only boosts your mission completion rating but also accelerates your progression unlocks. Enemy outposts (marked in red on the minimap) are always visible, but smart route planning allows you to clear them while completing your main mission.
Samples are crucial resources for upgrading Ship Modules, and higher difficulty missions increase the quantity and variety of Samples on the map.
Types of Points of Interest and Identification Methods
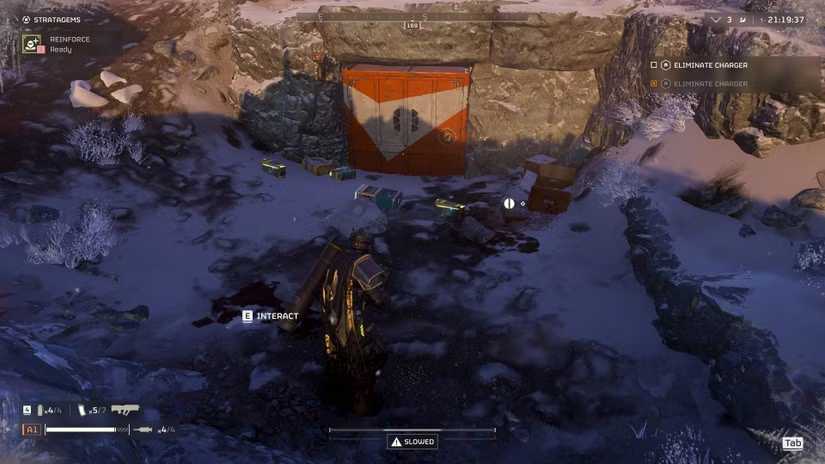
A yellow beam marks the location of a crashed ship, visible from a distance, and these locations often contain multiple resource containers. Containers are usually found in low-lying craters or under elevated structures, requiring explosives to open, and often hold Super Credits and Medals.
Bunkers require two players to press buttons simultaneously to open and are hotspots for high-tier resources. The Radar Station is a secondary objective itself; activating it reveals all POIs on the map, greatly increasing exploration efficiency.
Table: Main Point of Interest Types and Resource Yields
Efficient Search Route Planning
Choosing maps with open visibility, such as plains, significantly boosts exploration efficiency, as they allow you to spot POIs from afar. Avoid maps with sightline obstructing debuffs unless necessary, as they greatly increase exploration difficulty.
Difficulty 3 (Challenging) is considered the optimal balance point for exploration—it offers decent resource yield without the overwhelming number of enemies guarding every POI found in higher difficulties. At the start of the mission, use binoculars to scan the surroundings, mark visible POIs, and then plan a route that links multiple POIs and the main objective.
If playing with multiple people, use a radial search pattern, with each person responsible for a direction. Utilize high ground for an overview of the map, and frequently check the map to ensure no area is missed.
Team Collaboration Exploration Strategy
A four-person squad is the most efficient configuration for exploration. The team can split into two groups: one for the main objective and the other dedicated to exploration, coordinating progress via voice communication. When a bunker requiring two players is found, call for teammate support promptly.
Designate a “Resource Manager” with light gear to collect quickly, while other teammates provide fire support. Use the in-game marking system to indicate resource locations and enemy presence, keeping the team’s information synchronized.
Excess weapons and gear acquired during exploration can be shared with teammates in need, boosting overall combat strength. Successful extraction of all team members yields an extra experience bonus, so ensure no one is left behind.
Environmental Utilization and Risk Management
Use terrain cover to approach POIs, avoiding unnecessary combat. If a POI is guarded by enemies, consider using long-range weapons to clear the threat before moving in to collect.
Carrying Sentry turrets can provide regional security while you explore. Pay attention to the remaining mission time, ensuring enough time to complete the main objective and extraction.
Do not risk everything out of greed—if a resource point is too heavily guarded, weigh the risk versus reward. Sometimes abandoning a small amount of resources to guarantee mission success is the wiser choice. Always keep moving while exploring; standing still makes you an easy target for enemy encirclement.
Balancing Exploration Yield with Time Management
Although time remaining provides a reward, secondary objectives completed through exploration are generally more valuable than the time bonus. One thorough exploration run can yield the resource total equivalent to multiple rush-to-objective missions.
Establish clear priorities: Main Objective > Secondary Objectives > Points of Interest > Sample Collection. This ensures that the most important parts are completed even if time is short. If you find a “perfect map” that is particularly resource-rich, consider a full sweep; otherwise, moderate exploration and focus on mission goals.
Ammunition Management
In-Depth Magazine System Analysis
The game’s magazine mechanics simulate real-world weapon operation, where each magazine is an independent ammunition container. When you reload, the system does not transfer the remaining rounds from a partially used magazine into a “general ammo pool,” but rather discards the entire magazine and its contents. This means if you reload when a magazine is half-full, you permanently lose those bullets.
Different weapons have varying magazine capacities and reload speeds. For instance, assault rifles generally have a larger magazine capacity but slower reload speed, while pistols have smaller magazines but reload quickly.
Table: Comparison of Main Weapon Type Reload Characteristics
Special Weapon Reload Mechanisms
Weapons with the “Rounds Reload” trait are not affected by the magazine system. These weapons (mainly certain shotguns) use a round-by-round loading mechanism, allowing the reload process to be interrupted at any time to fire immediately without losing any ammunition.
Support weapons have unique reload rules. For example, the Autocannon requires carrying a dedicated ammunition backpack, and can only be reloaded when the barrel has 5 rounds or less.
Practical Ammunition Management Strategies
Visual cues are key to ammunition management. The ammo counter on the game interface clearly displays the remaining rounds in the current magazine, turning red when ammunition is low. Develop the habit of observing this indicator rather than relying on “feel” to decide when to reload.
The best time to reload is when the magazine is nearly empty, but the battlefield situation must also be considered. If a major fight is imminent, and there is a safe window to reload, reloading early might be wise, even if the magazine is not completely empty.
Utilize ammunition resupply points in the environment. Supply caches scattered on the map can provide ammunition replenishment. Plan your route to ensure you can reach these resupply points when ammunition is low. Also, the Supply stratagem can call in extra ammunition, but its usage needs to be managed wisely.
In high-difficulty missions, ammunition conservation is more important than kill efficiency. Avoid expending large amounts of ammunition on single light-armored targets, instead using precise single shots or melee attacks to dispatch them.
Team Collaboration and Resource Allocation
Team-wide ammunition allocation is crucial. If one teammate runs out of ammo while others have plenty, resources can be balanced by dropping weapons or sharing supplies. The in-game Supply stratagem can support the entire team, but its deployment timing needs to be coordinated.
Team reloading of support weapons can greatly increase efficiency. For instance, the Recoilless Rifle takes about 5 seconds to reload solo, but only about 0.5 seconds with a teammate assisting. This cooperation not only speeds up reloading but also allows the shooter to remain mobile and aiming during the process.
Communication is key to team ammo management. Use the in-game marking system or voice chat to inform teammates of your ammo status, especially when you need fire cover or cannot deal with certain enemies. A well-coordinated team can take turns providing suppressive fire, maximizing ammo efficiency.
Advanced Techniques and Special Situation Handling
Melee attacks are an effective way to conserve ammunition. For low-health enemies, using a melee attack instead of shooting can save valuable ammo. This is particularly useful when clearing small swarms or individual approaching enemies.
Use Stratagems to clear groups of enemies. When facing large numbers of enemies, using explosive Stratagems (like air strikes or bombardments) may be more ammo-efficient than using personal weapons. These abilities have cooldowns rather than consuming ammo, helping you deal with large-scale threats without depleting your bullet reserves.
Different enemies need different ammunition investment. Understanding enemy weaknesses maximizes ammo efficiency—for example, some enemies might be vulnerable to specific damage types or have destructible body parts; targeting these weaknesses can eliminate the target faster, thus saving ammunition.
From Position Selection to Tactical Extraction
The Core Value of Defensive Combat
The greatest advantage of defensive combat is that it allows you to control the pace of the fight, rather than being dictated by the enemy. By choosing advantageous positions and forcing the enemy to engage on your terms, you can maximize fire efficiency, conserve ammunition, and buy precious cooldown time for Stratagems. In high-difficulty missions, a defensive posture is often the only viable way to handle large-scale enemy assaults.
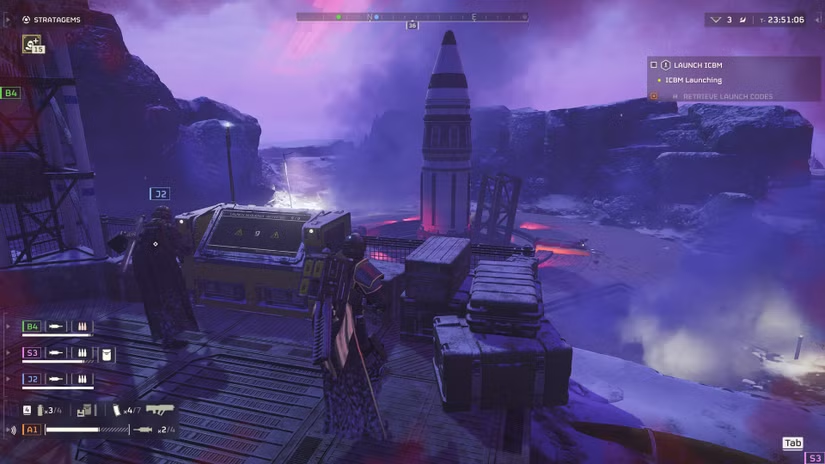
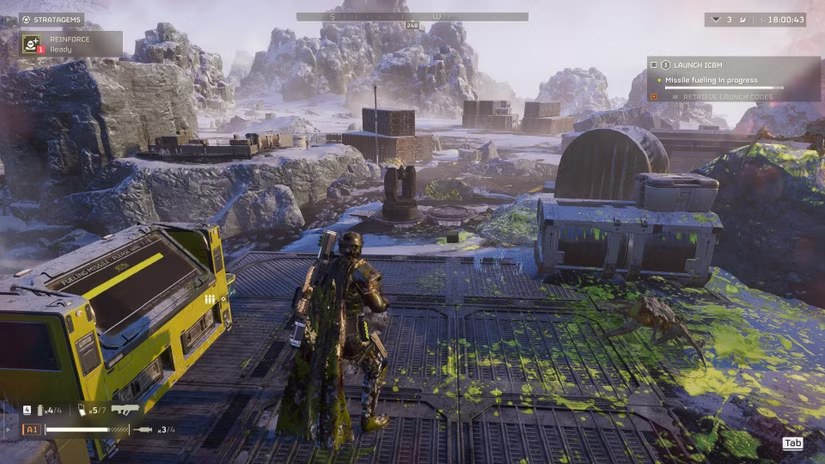
When your squad needs to defend a fixed objective (such as a launcher, seismic drill) or conduct an extraction, defensive combat ability directly determines mission success. Even offensive missions, such as destroying Bug Holes or Automaton Fabricators, often require establishing a solid defensive perimeter first to prevent being encircled during the assault.
Defensive Equipment and Stratagem Selection
Sentry weapons systems are the core of defensive warfare. The Gatling Sentry is fast-firing and flexible, effectively dealing with large numbers of light enemies; the Mortar Sentry provides indirect fire support, clearing targets out of sight; and the Autocannon Sentry is highly effective against medium-armored units
The Shield Generator Pack is an often-overlooked but extremely powerful defensive tool. It generates a fixed energy shield that blocks enemy projectiles. This equipment has a cooldown of only 90 seconds and can provide valuable cover for the team, especially against Automatons, where it effectively defends against rocket attacks. When using the Shield Generator Pack, deploy it slightly forward to both protect teammates and draw enemy fire.
Table: Comparison of Main Defensive Stratagems
The “Advanced Construction” Ship Module in the Engineering Bay increases Sentry durability by 50%, while the “Impact Dampening Gel” module in the Robotics Workshop increases Sentry ammunition capacity by 50%. These upgrades significantly boost the sustained combat capability of your automated defense systems.
Position Construction and Terrain Utilization
Selecting the right defensive position is crucial. An ideal location should have natural barriers to protect flanks, elevated visibility, and a clear retreat path. Narrow corridors or passes are excellent defensive points as they limit the number of enemies that can attack simultaneously.
Utilize in-game terrain features: On snowy planets, mines are partially covered by snow, making them harder for enemies to spot; in cold environments, weapon overheating is slower, but the rate of fire may also decrease.
Arrange the defense in layers: Place mines and traps at the very front, use the Shield Generator Pack for cover in the middle area, and deploy Sentry weapons and main combatants in the rear. This arrangement maximizes defensive depth, causing sustained losses to the enemy as they approach.
When the defensive position starts to crumble, a planned retreat is more effective than a disorderly rout. Pre-stage air support (like Cluster Bombs) along the retreat path to clear pursuing enemies. The Shield Generator Pack can also be used to cover a retreat—drop it at your feet to safely fall back to rear cover.
Team Coordination and Fire Distribution
Clear role specialization is key to defensive success. A balanced four-person squad should include: one heavy weapons specialist (to deal with armored units), one medical support (for healing and reviving), one Sentry weapon operator (to deploy and maintain automated defense systems), and one flexible support role.
Sentry weapons should be placed to create overlapping fields of fire, avoiding all weapons aiming at the exact same area. Ideally, fire coverage areas should overlap, but each Sentry should be responsible for a different angle. Also, ensure there is enough spacing between Sentry weapons to prevent a single explosion from destroying multiple defense assets.
Resource management is particularly important in prolonged defensive battles. Do not deploy all Stratagems at once; use them in rotation to ensure you always have available defensive tools during long engagements. Remember, Stratagems are based on cooldown, not uses, so smart timing is more important than conserving all assets.
Strategies for Dealing with Different Enemies
When fighting Terminids, the defensive focus should be on crowd control. Terminids typically attack with a large number of low-tier units combined with a few high-tier units. Use area-of-effect weapons (like the Flamethrower, explosive weapons) to clear the small bugs, while saving anti-armor weapons for large targets like Titans.
When fighting Automatons, prioritize eliminating ranged attacking units. Automaton Rocket Raiders can pose a huge threat from a distance, and the Shield Generator Pack is effective in defending against these attacks. Exploit the relatively slow movement of Automatons by gradually reducing their numbers as they approach.
Utilize enemy interactions: Advanced techniques include luring a Charger to ram a Bile Titan, or baiting a Bile Titan’s acid attack onto its own kind behind it.
When facing mixed enemy groups, prioritization is crucial: first deal with enemies that pose the greatest threat to your defenses (like units that can destroy Sentries from a distance), then high-value targets (like units that can call in reinforcements), and finally, ordinary melee enemies.
Transition from Defense to Offense
A successful defensive battle should eventually transition into an offensive action. Once the current wave of attack is cleared, push forward quickly to complete the main objective while the enemy is still organizing its next attack.
The ultimate goal of defensive combat is mission completion, not killing every single enemy. If a defensive battle lasts too long, consider an active retreat or a change in tactics, rather than an endless expenditure of resources.
From Basic Operations to Team Coordination
The Tactical Value and Physical Mechanics of Going Prone
The prone position reduces the target area by about 70%, changing you from a large standing target to a low silhouette on the ground. Automated defense systems like Sentry turrets have specific firing height settings, and you are generally below their line of fire when prone. More importantly, going prone significantly improves weapon stability, especially for high-recoil weapons like Light Machine Guns and Assault Rifles. Prone shooting can reduce the spread by over 50%, making it easier to accurately hit enemy weak points.
Table: Comparison of Different Stances on Weapon Performance
There are two quick ways to transition from standing to prone: directly pressing the prone key initiates a brief animation, while using a tactical dive (pressing the prone key while sprinting) results in a quick slide into the prone position, which is better for emergency evasion. Note that movement speed is extremely slow when prone, and turning is limited, so side security must be ensured before choosing a prone position.
Practical Application Scenarios Analysis
Defensive battles are the best scenario for prone shooting. When the squad needs to hold a position against waves of enemies, front-row players shoot prone, and back-row players shoot standing, creating staggered lines of fire to maximize fire output while avoiding crossfire. Under enemy suppression fire, going prone not only reduces the chance of being hit but also gives teammates an opportunity to counterattack from the flanks.
Against Terminids, going prone is particularly effective for dodging Stalker ambushes. Against Automatons, going prone can help you evade most Scout straight shots, but its effect is limited against explosive weapons, still requiring reliance on cover.
Fighting in narrow corridors is another ideal scenario for prone shooting. When the team needs to pass through a tunnel or corridor, the first player goes prone to provide suppressive fire, and the second player stands to shoot over the prone player, forming a two-tier firing network.
Team Coordination and Communication Strategy
Team communication is key to avoiding friendly fire when prone. Use voice chat or quick commands to inform teammates of your intention to go prone, especially when you are about to move into the line of fire. A simple “I’m prone” or “Prone ahead” allows teammates to adjust their firing angles in time.
Establishing fire tiers is an advanced tactic: designate 1-2 players as prone skirmishers, using Light Machine Guns or Assault Rifles to provide continuous fire; other players provide standing mid-range support, using precision weapons or explosives; Sentry turrets should be deployed on the flanks or high ground to avoid overlapping with teammate lines of fire.
When a teammate is prone, standing players are responsible for protecting their flanks, as the prone player’s visibility and movement are restricted. Proper specialization means the prone player focuses on enemies in front, while standing players watch the flanks and rear, keeping an eye on new threats on the map.
Advanced Techniques and Risk Management
Position selection after going prone is crucial. An ideal position should have partial cover for the flanks while allowing clear observation of enemies in front. Avoid going prone in open ground; otherwise, while avoiding friendly fire, you become a clear target for the enemy.
Quick stand-up technique is vital for survival. Double-tapping the direction keys or using a quick stand-up shortcut allows you to rapidly transition from prone to standing and moving, which is extremely important when needing to quickly change position. Experienced players start standing up as their magazine is nearly empty, moving to a new position during the reload process.
Different terrains require different prone strategies: going prone behind tall grass or low obstacles provides natural camouflage; when prone on a slope, choose the side of the slope rather than the direct incline for a better firing angle while reducing exposed area.
Identifying dangerous situations: When enemies use area-of-effect weapons, going prone can actually increase risk because you cannot quickly dodge explosives. Similarly, against enemies that can attack the ground (like some Terminid units), going prone may not be the best choice.
Weapon and Gear Pairing Recommendations
The Light Machine Gun is the best choice for prone shooting; its large magazine capacity and need for sustained fire perfectly match the prone stance. Combined with a bipod attachment (if the game supports it) further increases stability. Sniper Rifles also benefit from the prone stance, allowing for extremely precise long-range shooting.
Armor choice affects the prone benefit: Light armor allows for faster prone/stand-up transitions but offers less protection; heavy armor is the opposite. Choose appropriate armor based on your team role—frontline players might opt for medium armor to balance mobility and protection.
Backpack equipment selection: The Supply Pack can provide ammunition support to prone teammates; the Shield Generator Pack can offer additional protection to the prone player, compensating for the lack of mobility.
From Basic Call-in to Battlefield Artistry
Stratagem Fundamentals: Call-in and Deployment
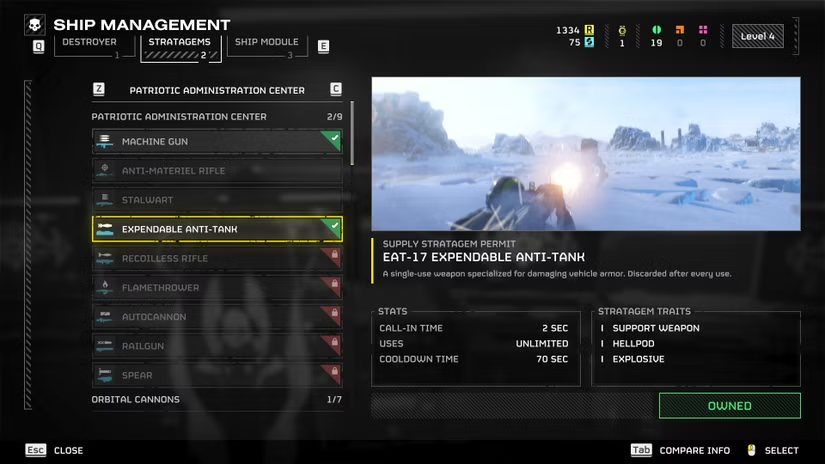
To use Stratagems, you first need to unlock them using Requisition Slips at the Ship Management terminal on your destroyer; this is free currency earned by completing missions. Before each mission, you can select up to four Stratagems to take into the field.
During the mission, hold L1 (PlayStation) or Ctrl (PC) to open the Stratagem wheel, and then input a specific sequence using the directional keys or stick. After successful input, you will receive a beacon, which you throw to the location where you want the Stratagem to land. Note: some planetary effects may change your input method, such as reversing commands, so you must always adapt.
Stratagems have two main limitations: cooldown time (you must wait a period after use before using it again) and limited uses. Most offensive Stratagems like Airstrikes have cooldowns, while some support weapons may have limited uses.
Stratagem Types and Usage Scenarios
Stratagems are classified into several main categories, each with a different purpose:
Offensive Stratagems are used to directly attack enemies. The Eagle Airstrike is highly versatile, has a short cooldown, and is suitable for all enemy types. The Orbital Precision Strike is excellent for clearing Bug Holes and dealing with stronger enemies like Chargers. The 500kg Bomb is the ultimate choice for clearing large areas in the late game.
Defensive Stratagems help you and your team survive enemy attacks. Sentry turrets (such as Machine Gun Sentry, Gatling Sentry, Mortar Sentry) provide automated defense. The Shield Generator Pack can protect you and your team from enemy fire, which is particularly useful for defensive missions.
Support Stratagems provide additional resources or capabilities. The Supply Pack ensures your team doesn’t run out of ammunition. The “Guard Dog” Rover is a drone that follows you and automatically attacks nearby enemies, which is great for clearing small enemies and conserving ammo.
Table: Recommended Stratagems for Different Game Stages
Tips for Efficient Stratagem Use
Timing is everything. Deploy Sentry turrets before enemies arrive, not after. Use Airstrikes when enemy groups are concentrated. Predict enemy movement and place Stratagems in their path of advance.
Positioning is important. Place Sentry turrets on high ground for better visibility. Avoid placing them too close together, or one explosion might destroy multiple turrets. Use chokepoints like narrow passages to maximize Sentry turret effectiveness.
Combine Stratagems for maximum effect. For example, use the EMS Mortar Sentry to slow enemies, then use the regular Mortar Sentry or an Airstrike to attack the trapped enemies.
Use Stratagems proactively rather than passively. Don’t wait for an emergency to use your Stratagems. If you see a group of enemies, even if not an immediate threat, call in an Airstrike. Pre-place Supply Packs near the objective area so your team can rearm when needed.
Teamwork and Resource Management
Coordinate Stratagem selection with your team. If everyone carries the same Stratagem, you may find a lack of diversity. Balance your choices—some carry anti-armor weapons, some crowd control, and some support Stratagems.
Share support weapons. If you call in a support weapon like the Recoilless Rifle but already have one, let your teammates know they can use it.
Manage your cooldowns and resources. Don’t use all powerful Stratagems at once at the start of the mission. Stagger their use so you always have an available option. Save powerful Stratagems like the Orbital Laser for truly emergency situations, such as Bile Titans or large groups of Automatons.
Stratagem Selection for Different Enemies
For Terminids, prioritize crowd control Stratagems. The Flamethrower, Machine Gun Sentry, and Airstrikes are highly effective for dealing with swarms. For large enemies like Bile Titans, save anti-armor options like the Recoilless Rifle or Orbital Precision Strike.
When fighting Automatons, focus on precision strikes and anti-armor capabilities. Automatons generally have more ranged units, so the Shield Generator Pack and precise explosives are more effective. The Gatling Sentry can quickly eliminate flying units and smaller bots.
Advanced Techniques and Ship Upgrades
To further enhance Stratagem effectiveness, invest in Ship Module upgrades. For example, the “Liquid-Ventilated Cockpit” Ship Module can reduce the Eagle Stratagem cooldown by up to 50%, allowing you to use them more frequently.
Practice your Stratagem inputs until they become second nature. In intense combat, the speed and accuracy of your input can mean the difference between survival and failure. Consider practicing on the Stratagem Hero mini-game on your ship; this can help you memorize the patterns.
From Novice to Muscle Memory Master
Core Command Codes: The Survival Passwords Every Player Must Memorize
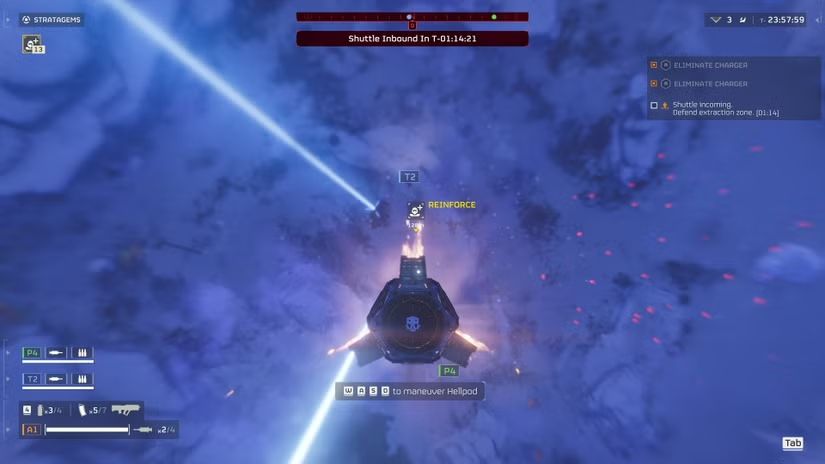
Among all Stratagems, there are two command codes that must be kept in mind regardless of loadout: Resupply and Reinforce. The Resupply command code is Down, Down, Up, Right, which provides vital ammunition and resources for your squad, indispensable in prolonged battles. The Reinforce command code is Up, Down, Right, Left, Up, which allows you to summon fallen teammates back to the battlefield, ensuring the team’s sustained combat capability.
These two Stratagems are always available, regardless of your equipment choices, and are crucial for any mission type. Converting them into muscle memory allows you to call them in without conscious thought under heavy fire, buying precious time for the team.
Table: Must-Memorize Stratagem Command Codes and Their Value
Command Code Memorization Methods and Training Tips
Converting command codes into muscle memory is the key. Merely knowing the sequence is not enough; you need to input it accurately and quickly under pressure. It is recommended to practice on the Stratagem Hero mini-game on the ship, which is specifically designed to train command code input.
Group memorization is effective. Break down complex command codes into smaller chunks: for example, Reinforce’s “Up, Down, Right, Left, Up” can be split into “Up-Down” and “Right-Left-Up.” First, practice the fluidity of each group, then combine them into the full command code. Association memory can also accelerate mastery; create a short story or associated image for each command code.
Input methods vary slightly by platform: PlayStation players use the D-pad, and PC players use the WASD keys (W=Up, A=Left, S=Down, D=Right).
Mission-Specific Command Code Selection
Pre-loading command code combinations based on the mission type can greatly increase efficiency. For defensive missions, Sentry Stratagem codes like Gatling Sentry (Down, Up, Right, Left) and Mortar Sentry (Down, Up, Right, Right, Down) are very useful. They establish an automated defense network, helping the squad cope with waves of enemy attacks.
Offensive missions are better suited for codes like Eagle Airstrike (Up, Right, Down, Right) and Orbital Precision Strike (Right, Right, Up). These Stratagems quickly clear areas of enemy concentration, creating opportunities for advancement. Considering the call-in time and cooldown of Stratagems is also important—Eagle Stratagems are usually called in faster but have limited uses, while Orbital Stratagems have longer cooldowns but greater power.
Environmental factors also influence command code selection. Some planets have special conditions, such as magnetic storms that can interfere with command code input.
Team Collaboration and Command Code Specialization
Coordinating command code choices among squad members maximizes team effectiveness. If all four players carry the same Stratagem, it can lead to a lack of diversity. Ideally, the team should cover different categories of Stratagems: one person for anti-armor, one focused on crowd control, one providing support, and another flexible to handle special situations.
Define clear roles: Designate one player to primarily handle Resupply and Reinforce, and another to focus on Sentry deployment, so that everyone can quickly call in their most familiar command code in an emergency. Communication is the key to collaboration—always inform teammates before calling in a Stratagem that might affect them (like an air strike or bombardment).
Utilize Stratagem synergy: For example, use the EMS Mortar Sentry to slow enemies, then use the regular Mortar Sentry or an Airstrike to clear the controlled enemies. This combination requires team members to coordinate the timing and placement of command code calls.
Advanced Techniques and Practical Application
Inputting command codes while moving is an essential skill. Although standing still is more accurate, it’s often impractical in intense combat. Practice inputting command codes behind cover or in movement gaps to significantly improve survival rate. Maintain situational awareness—even when focusing on inputting a command code, be aware of your surroundings to avoid being ambushed.
Emergency command code call-in procedure: Having a pre-established response flow is very helpful when the squad is in trouble. For example, upon encountering heavily armored enemies, immediately call in the anti-armor Stratagem; when encircled by a large number of enemies, prioritize calling in the area-of-effect Stratagem. Turning these response solutions into habits allows you to remain calm in chaos.
Error management and correction: Don’t panic when an incorrect input occurs—the game allows you to restart. The key is to recognize the mistake and immediately reset, rather than continuing the wrong sequence. In high-pressure situations, maintaining a stable input rhythm is more effective than fast but erratic input.
From Basic Use to Advanced Tactics
In ヘルダイバー2, Stims are your most important survival resource on the battlefield; they can not only instantly restore full health but also clear all limb damage effects, allowing you to quickly return to the fight from a near-death state.
Stim Core Mechanics and Usage Timing
The basic effect of Stims is immediate health restoration, but their actual value goes far beyond that. When your character suffers limb damage (such as arm damage causing aiming difficulty, or leg damage affecting movement speed), using a Stim can instantly repair these injuries, restoring full combat capability. More importantly, Stims also provide a brief continuous healing effect while active; even if you take damage during this time, your health will continue to recover until full. This allows you to heal while pushing forward in dangerous situations.
Determining the optimal time to use a Stim is crucial. Ideally, you should use a Stim when your health is below 30% or when you have severe limb damage that affects combat. Avoid rushing to use a Stim when health is only slightly damaged, as Stims are a scarce resource, and you can only carry a limited number per mission. Especially in high-difficulty missions, reckless Stim use can lead to being out of Stims at a critical moment.
Stims can also instantly restore your stamina bar and temporarily lock it to full. When your stamina is depleted, using a Stim allows you to immediately resume sprinting.
Team Collaboration and Healing Strategy
In team combat, Stim usage strategy requires a higher level of coordination. You can use Stims to heal teammates by aiming at them and pressing the corresponding interaction key.
Team resource allocation is the core of Stim management.
Choosing armor with the “Med Kit” skill can significantly enhance your healing capability.
Resource Acquisition and Efficient Management
Stims can be acquired through various means, but all require strategic planning. The most basic source is the 4 Stims you start the mission with (unless using specific armor skills to increase the number). Supply drops are the main source of replenishment, providing 2 Stims each time, but they have a cooldown, requiring careful timing for use.
Scattered “Salute for Freedom” supply points on the map also sometimes contain Stims, but in smaller quantities and random locations. An advanced tip: redeploying after death replenishes Stims.
The key to efficient Stim management is balancing risk and reward. Do not rush to pick up all items in a supply drop; instead, take what you need in batches. If your Stim reserve is adequate, you can take other resources first, leaving the remaining Stims for emergencies.
High-Difficulty Mission Special Strategy
As the difficulty increases, Stim management becomes more critical. At “Suicide Mission” and “Helldive” difficulties, enemy attacks are more aggressive, and Stim consumption rate increases significantly. At this point, you need to be more cautious about when to use them, prioritizing the survival capability needed to complete the main objective.
The team role specialization in high difficulties also becomes clearer. Designating one player to focus on healing and support, carrying armor and gear that increases Stim effectiveness, can greatly improve the team’s overall survival rate. Other players can then focus on fire output and mission objective completion.
Environmental utilization also plays an important role in saving Stims. Smart use of cover, maintaining movement, and avoiding unnecessary engagements can reduce damage taken, thereby lowering Stim consumption.
Common Mistakes and Optimization Solutions
Many novice players often make the mistake of overusing Stims: using them when only slightly injured or without limb damage, leading to a shortage of resources during critical combat. The correct approach is to accept minor damage, saving Stims for true crises.
Ignoring team collaboration is another common issue: focusing only on one’s own Stim use without paying attention to teammate status. The optimization solution is to develop the habit of regularly checking teammate status and providing timely assistance to those who need healing.
Improper supply timing also affects Stim efficiency: calling in a supply drop too early in a safe area, or being unable to reach the supply point during intense combat. The ideal is to call in a supply drop while moving toward the next objective, ensuring the team has sufficient resources before entering a new engagement.