Nouvelles et guides
Comment utiliser les boosters dans Helldivers 2
To use Boosters in Helldivers 2, select one from your arsenal in the empty hexagon on the Stratagems loadout screen before deploying; remember that their beneficial effects apply to your entire squad, but do not stack, so coordinate with teammates to choose different ones for maximum advantage .
From Medal Collection to Store Unlock
In “Helldivers 2,” Boosters are powerful items that provide passive buffs to the entire squad, but to obtain them, you first need to understand the in-game economic system and unlock path.
Medals
The first step to acquiring Boosters is collecting Medals, the sole currency for unlocking Boosters. Medals are primarily obtained by completing various in-game activities:
- Completing Mission Objectives: Every Main Operation and mission rewards Medals upon completion; higher difficulty usually yields more generous rewards.
- Searching the Map: When executing missions, carefully explore Points of Interest on the map, such as crashed ships, bunkers, and containers, where you might find hidden Medal caches.
- Completing Personal Daily Orders: Logging in daily to complete specific Personal Orders is a stable source of extra Medals.
Accumulating Medals is a long-term investment; do not expect to buy all Boosters after just one or two missions. Develop a plan to prioritize purchasing the Boosters that most benefit your playstyle.
Warbonds and the Acquisition Center
Once you have Medals, the next step is to head to the Acquisition Center on your Super Destroyer. This is where you access the Warbond interface, which can be thought of as a premium battle pass where progression is bought with Medals instead of real currency.
There are primarily two Warbond types in the game:
- “Helldivers Mobilize!” (Standard Warbond): Contains 6 Boosters and is the initial and main source.
- “Steeled Veterans” (Premium Warbond): Contains 1 unique Booster, and requires spending Super Credits (another in-game currency) or purchasing the Super Citizen Edition to unlock this Warbond.
At the Acquisition Center, after selecting a Warbond, you will see a paginated catalog. Boosters are scattered across different pages; you must spend Medals to unlock preceding pages or items to access subsequent pages.
Booster Purchase List and Strategy
The table below details all Boosters available at the game’s launch and their key information to assist your purchasing decisions:
Table: Booster Acquisition Details and Effects Overview
| Booster Name | Warbond Location | Specific Page | Medal Price | Effect Description |
|---|---|---|---|---|
| Hellpod Space Optimization | Helldivers Mobilize! | Page 3 | 15 Medals | Squad members exit their Hellpod with maxed-out Ammo, Grenades, and Stim Packs |
| Vitality Enhancement | Helldivers Mobilize! | Page 4 | 20 Medals | Makes all Helldivers more resistant to damage (Increased damage resistance) |
| UAV Recon Booster | Helldivers Mobilize! | Page 6 | 40 Medals | Increases the radar range of the whole team’s mini-map, making it easier to spot objectives and enemies |
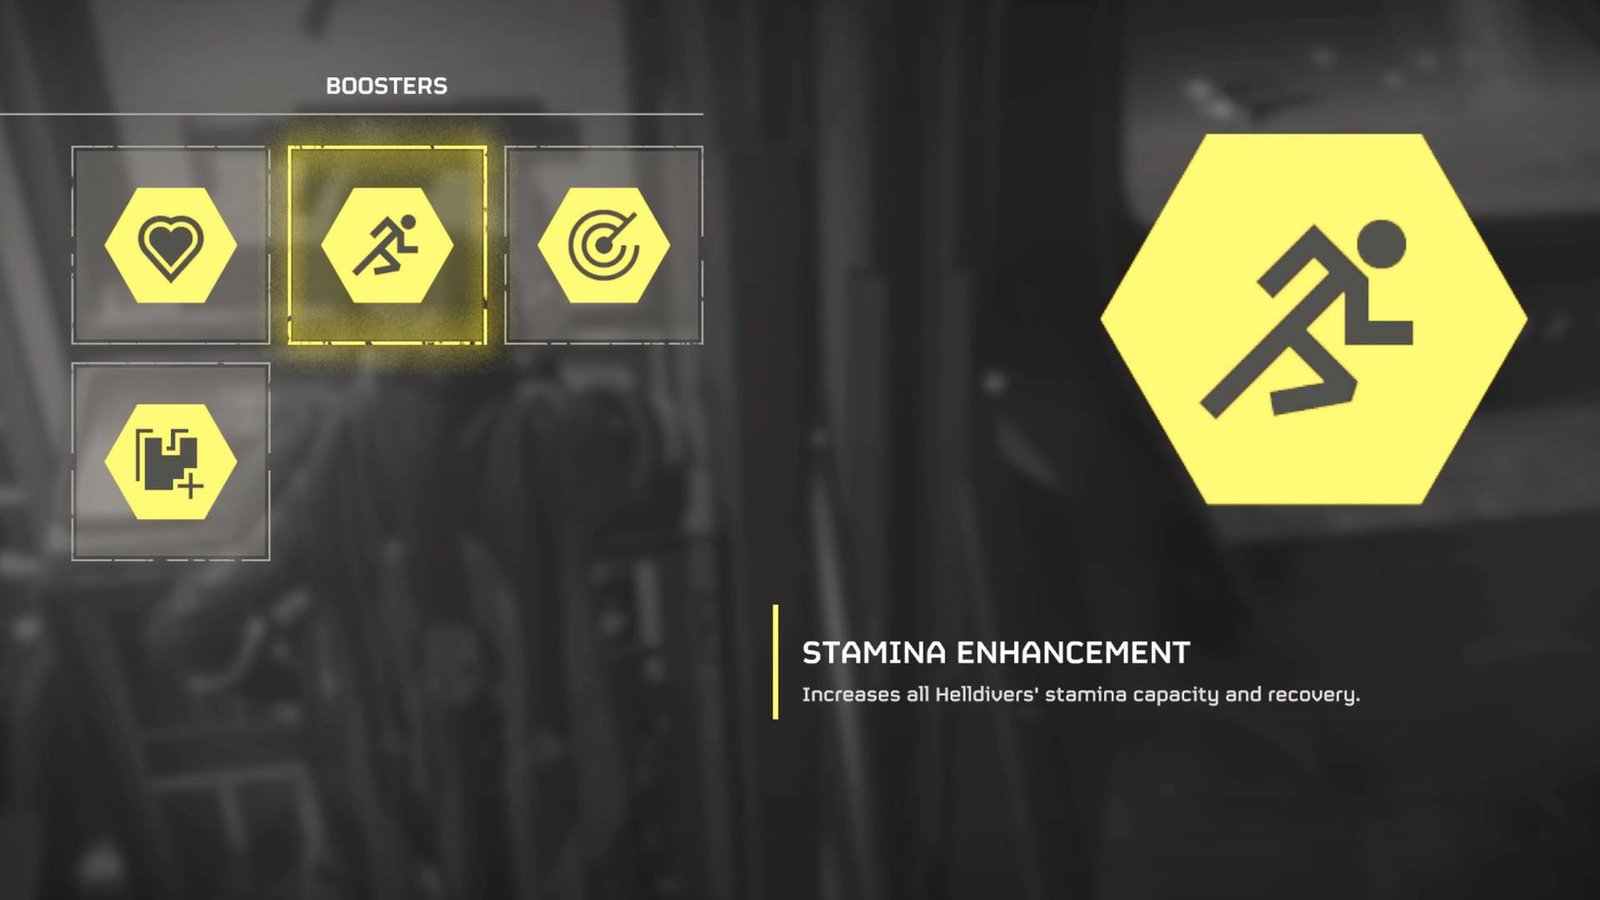
| Endurance Enhancement | Helldivers Mobilize! | Page 7 | 75 Medals | Increases all Helldivers’ stamina capacity and speeds up recovery |
| Muscle Enhancement | Helldivers Mobilize! | Page 9 | 70 Medals | Allows the squad to easily traverse difficult terrain (Reduced movement impedance) |
| Increased Reinforcement Budget | Helldivers Mobilize! | Page 10 | 150 Medals | Increases the total number of Reinforcements available to the squad (i.e., total respawns) |
| Flexible Reinforcement Budget | Steeled Veterans | Page 3 | 75 Medals | Shortens the time required to earn new Reinforcements after running out of the current budget |
For players with limited resources, here are some purchasing strategies:
- Beginner Priority Recommendation: Hellpod Space Optimization (15 Medals) is highly cost-effective, allowing you and your teammates to start with all basic supplies, excellent for sustained combat.
- Must-Haves for High-Difficulty Missions: When challenging higher difficulties, Increased Reinforcement Budget (150 Medals) and Vitality Enhancement (20 Medals) significantly increase the team’s margin for error and survivability.
- Team Coordination: Since the effects of identical Boosters do not stack, communicating with squad members and having each player choose a different Booster is key to maximizing team benefit.
Upon successful purchase, the Booster is permanently added to your armory. You can view all unlocked Boosters in the “Boosters” tab of the ship’s Armory. Remember, Boosters are permanent items and can be used infinitely once unlocked.
Booster Usage
In “Helldivers 2,” Boosters are critical equipment that provides passive benefits to the entire squad, but many players are confused about how to use them correctly. Unlike consumables, Boosters are permanent items that can be reused infinitely; they take effect in a mission as long as they are correctly equipped.
The Specific Steps to Equip a Booster
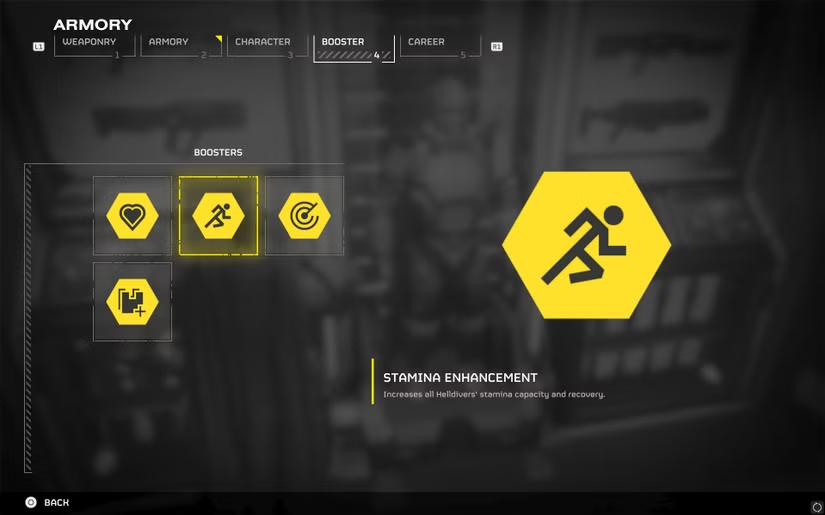
First, you can set a default Booster in the ship’s Armory: Enter the Armory (usually near the entrance to the ship’s bridge), select the “Boosters” tab, browse all unlocked Boosters, and choose the one you want to use by default.
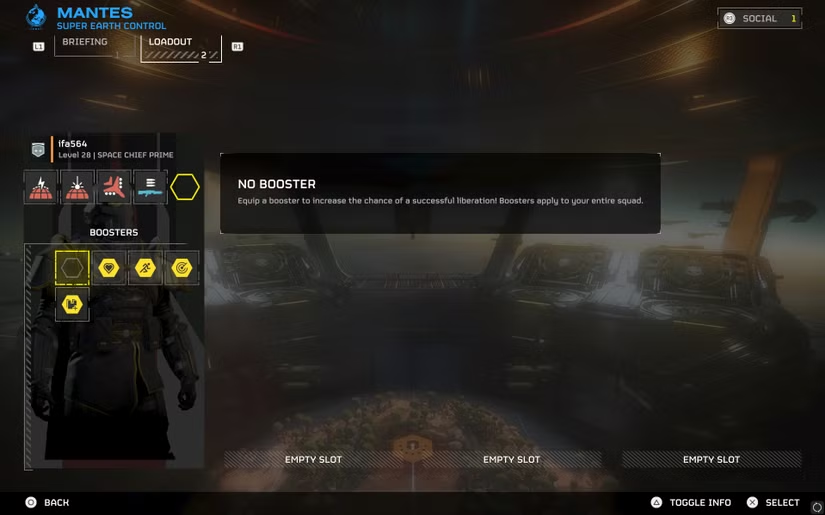
The more common time to equip is during the mission preparation phase. After you enter your Hellpod and select the drop point, the game enters the Stratagem selection screen. To the right of the four Stratagem slots, you will see an empty hexagonal icon—this is the Booster selection slot. Clicking it displays a list of all unlocked Boosters; selecting one activates it for this mission.
Table: Main Booster Effects and Applicable Scenarios
| Booster Name | Main Effect | Best Applicable Scenario |
|---|---|---|
| Hellpod Space Optimization | All members start with max Ammo, Grenades, and Stims | All mission types, especially high-difficulty sustained combat |
| Vitality Enhancement | Increases all members’ damage resistance, reduces limb injury chance | Against high-damage enemies, primary choice for beginner teams |
| UAV Recon Booster | Increases radar range by 50%, spots objectives earlier | Scout missions, large map exploration |
| Endurance Enhancement | Increases sprint duration by 30%, speeds up stamina recovery | Blitz missions, situations requiring fast movement |
| Muscle Enhancement | Easily traverse difficult terrain (snow, mud, etc.) | Missions on planets with special environments |
| Increased Reinforcement Budget | Provides up to 4 extra Reinforcements for the whole team | High-difficulty missions, when team survivability is low |
| Flexible Reinforcement Budget | Reduces the cooldown for new Reinforcements by 10% after running out | Alternative option to Increased Reinforcement Budget |
The Key Rule for Team Coordination
The most important rule in Booster usage is that effects do not stack. If two players choose the same Booster, the whole team only receives one instance of the effect, and the other slot is wasted. Therefore, once a player selects a Booster, that option appears as unavailable to other players.
A four-person squad can activate a maximum of four different Boosters simultaneously, meaning the ideal setup is for each member to choose a different Booster to maximize team benefit. This requires communication and coordination among teammates before the mission starts. If teaming up with random players, observe their selections first and then complement the Booster types they haven’t covered.
Mission Type and Booster Selection Strategy
For Annihilation or Defense missions, prioritize “Hellpod Space Optimization” (ensuring sufficient firepower at the start) and “Vitality Enhancement” (increasing survivability). For missions requiring extensive movement and exploration, “UAV Recon Booster” and “Endurance Enhancement” are good choices, helping the team locate objectives and navigate more efficiently.
Terrain consideration is also important: on snowy or muddy planets, “Muscle Enhancement” can negate movement penalties; while on confined or low-visibility maps, “UAV Recon Booster” is more practical.
If the team includes new players, prioritize ensuring “Vitality Enhancement” is selected, as this significantly increases their chances of survival. For experienced teams, more aggressive combinations, such as “Hellpod Space Optimization” paired with “Increased Reinforcement Budget,” can be tried for challenging higher-difficulty missions.
Practical Tips and Common Issues
After dying and redeploying during a mission, if the “Hellpod Space Optimization” Booster is active in the squad, you will still rejoin the fight with a full loadout. When playing solo, choosing Boosters that clearly benefit the individual, such as “UAV Recon Booster” or “Endurance Enhancement,” is more sensible.
A common issue where a Booster does not take effect is usually due to it not being correctly equipped (remember to confirm the final selection in the mission preparation screen) or the effect being duplicated by a teammate. If you cannot select your desired Booster, it is likely because you have not unlocked it, or a teammate has already selected the same one.