Noticias&Guías
Cómo subir de nivel rápidamente en Helldivers 2
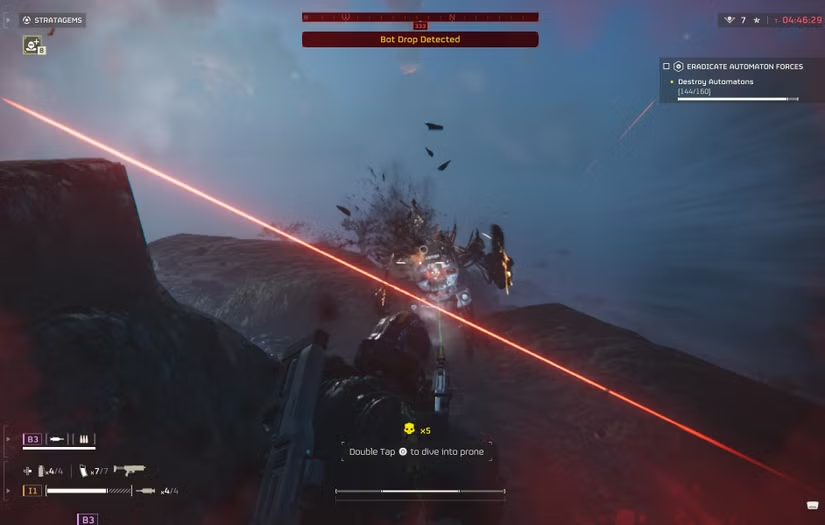
To level up quickly in Helldivers 2, focus on completing missions, especially Eradicate missions like Bug Elimination on lower difficulties, as they can be finished in under 5 minutes for a fast, repeatable source of XP . For larger gains, tackle missions on higher difficulties like Helldive, which offer a 250% experience multiplier, and ensure your entire squad extracts successfully to maximize the bonus .
Full Squad Annihilation Mission Upgrade Guide
In “Helldivers 2,” forming a full four-person squad to execute Annihilation missions is widely recognized as the most efficient way to level up. This mission type focuses on eliminating a specified number of enemies, has clear objectives, and a short completion time. With coordinated teamwork, it allows for maximum experience gain. Compared to Main Operation missions that can take up to 40 minutes, Annihilation missions can usually be completed in 5-12 minutes, offering a fast and repeatable path for experience acquisition.
Difficulty selection directly correlates with the amount of experience gained. The game features nine difficulty levels, from Trivial to Helldive, each with a corresponding experience bonus multiplier. For example, Helldive difficulty offers a 250% XP bonus, Suicide Mission offers 150%, and Extreme difficulty offers 100%.
Table: Experience Rewards and Challenges of Annihilation Missions at Different Difficulties
| Difficulty Level | Experience Bonus Multiplier | Estimated Mission Duration | Main Challenges |
|---|---|---|---|
| Medium | 25% | 5-8 minutes | Lower enemy count, suitable for novice teams to practice coordination |
| Challenging | 50% | 6-9 minutes | Armored units begin to appear, requiring basic tactical coordination |
| Extreme | 100% | 7-10 minutes | Heavy units are common, requiring efficient firepower coordination |
| Suicide Mission | 150% | 8-12 minutes | Elite units such as Bile Titans and Chargers appear frequently |
| Helldive | 250% | 10-15 minutes | Extremely high enemy count, elite units in groups, demands maximum team coordination |
Equipment synergy among squad members is key to success. A balanced team should consider the following roles: at least one player equipped with Machine Gun Sentry or Mortar Sentry for automated defense against hordes of common enemies; one player carrying an Anti-Armor weapon like Railgun or Recoilless Rifle to specialize in heavy units; another player carrying a Shield Generator Pack to boost team survivability; and the fourth player flexing with control or area damage Stratagems, such as EMS Mortar Sentry or Eagle Airstrike. For weapons, the SG-225 Breaker Shotgun is a preferred primary weapon for many players due to its high damage and good crowd control capability.
In practice, choosing the drop point and standardizing the execution process can greatly enhance efficiency. The team should select high ground or an easily defensible area for the drop, and quickly deploy sentries and resupply. The ideal procedure is: Drop → Immediately deploy sentries and resupply → Establish a defensive perimeter → Sentries handle the bulk of enemy kills → Squad members focus on stragglers and heavy units → Quick extraction upon objective completion. Team members need to stay relatively close for mutual support but not too clustered to avoid being wiped out by area-of-effect attacks.
Dealing with high-tier enemies requires clear prioritization and focused fire. For the Terminids, Bile Titans and Chargers should be the highest priority targets, handled specifically by players with anti-armor weapons. For the Automaton faction, prioritize eliminating Devastator units and Mortar units which possess long-range firepower. Communication and the marking system are crucial here; the squad leader or designated player should promptly mark high-threat targets to guide the team’s concentrated fire.
To maximize experience gain, the team should also ensure all members successfully extract, as each surviving member contributes an additional experience bonus. Furthermore, while the main goal of Annihilation missions is enemy elimination, quickly clearing secondary objectives or Points of Interest (such as Radar Stations, Sample Containers) that are along the way can yield extra experience and squad resources, provided it doesn’t significantly prolong mission completion time.
Maximizing Experience Gain
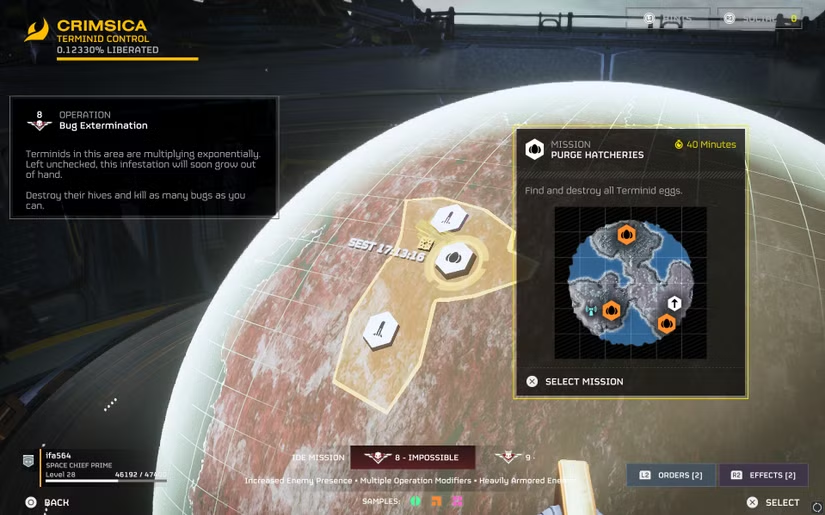
In “Helldivers 2,” Bile Spewer missions are one of the highly effective ways to quickly gain experience points, especially when completed on Extreme or higher difficulties, where the XP reward is significantly increased. The primary objective of these missions is to destroy a specific number of Terminid Bile Spewers (usually marked in red on the map). The mission time limit is 40 minutes, but with optimized strategies, they can be completed much faster, thereby maximizing the efficiency of experience acquisition.
Mission Mechanics and Difficulty Selection
The core mechanic of Bile Spewer missions is straightforward: multiple Bile Spewers are generated on the map (usually marked in red), and players need to approach and destroy them by throwing grenades or using explosives. Difficulty selection directly influences the number of Spewers and the XP reward. On Extreme difficulty, usually 2-3 Spewers need to be destroyed to complete the mission, while on Helldive difficulty, this requirement might increase to 3 or more. Choosing a higher difficulty not only grants a higher XP multiplier (e.g., Helldive difficulty offers a 250% XP bonus) but also increases the drop rate of Rare Samples, which are crucial for upgrading ship modules.
Table: Bile Spewer Mission Configuration and Rewards by Difficulty
| Difficulty Level | Number of Spewers to Destroy | Experience Bonus Multiplier | Estimated Mission Duration |
|---|---|---|---|
| Challenging | 2 | 50% | 15-20 minutes |
| Extreme | 2-3 | 100% | 12-18 minutes |
| Helldive | 3 or more | 250% | 15-25 minutes |
Equipment Selection and Stratagem Loadout
The SH-32 Shield Generator Pack is core to survivability, available at level 20 and costing 10,000 Requisition Slips. It provides 360-degree protection, effectively blocking attacks from Bile Titans and Acid Spewers, offering crucial defense while players set up explosives near the Spewers. Other strongly recommended Stratagems include:
- Mortar Sentry: Automatically attacks enemies within range, effectively clearing hordes and creating space for the team.
- Orbital Laser: The ultimate weapon against large enemies like Bile Titans, capable of instantly eliminating most heavy units.
- Grenade Launcher: Quickly clears smaller enemies around the Spewer and inflicts significant damage on the Spewer itself.
- Eagle 500kg Bomb: Another highly effective option for clearing Spewers and dealing with emergencies.
For primary weapons, the SG-225 Breaker Shotgun is a preferred choice for many players due to its high damage and crowd control ability, especially suited for close-quarters combat near the Spewers.
Teamwork and Mission Execution Strategy
A full four-person squad is the ideal configuration for high-difficulty Bile Spewer missions. Team members should have clear roles: one player focusing on destroying the Spewers, another providing suppressing fire, a third deploying sentries, and the fourth offering mobile support and handling special situations.
The mission execution process can be optimized into the following steps:
- Precision Drop: Land directly at the first Bile Spewer location to save time traveling to the objective.
- Quick Defense Setup: Immediately deploy automated defenses like Mortar Sentries to control the area.
- Focused Spewer Clearing: Team up to destroy Spewers in quick succession, avoiding prolonged delays at a single location.
- Extraction Priority: Immediately prepare for extraction upon completing the primary objective, ignoring secondary objectives to maximize time efficiency.
Communication is key to team success. Use voice chat or the in-game marking system to coordinate actions, especially when engaging elite enemies like Bile Titans. One player marks the high-priority target, and others concentrate their fire for a quick elimination.
Survival Tips and Experience Optimization
Survival is crucial in high-difficulty Bile Spewer missions. Always keep moving; standing still makes it easy to be surrounded by the horde. Utilize terrain advantages, such as high ground or narrow passages, to restrict enemy approach from a single direction. Be careful of friendly fire, especially the landing spots of Mortar Sentries, which can injure teammates, making proper deployment location critical.
Successfully extracting all squad members provides an additional experience bonus, so ensure no one is left behind. If a teammate is down, try to use the Reinforcement Stratagem for rescue only when safety is guaranteed.
From Novice to Expert
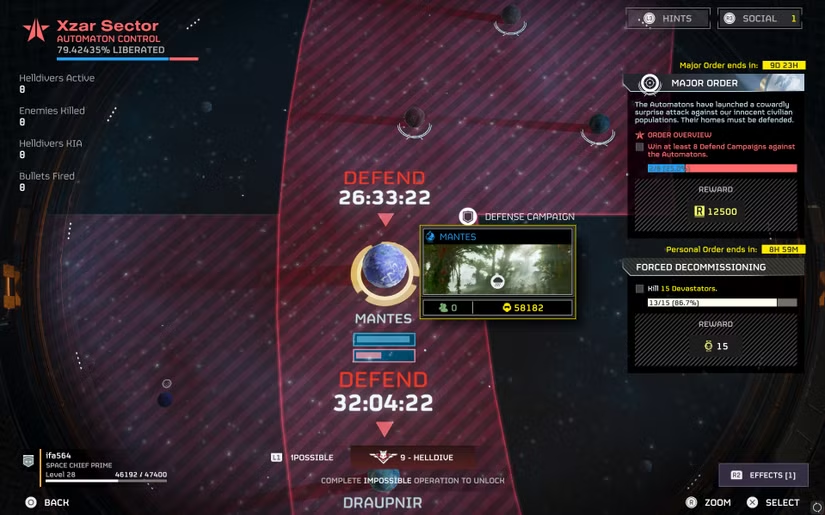
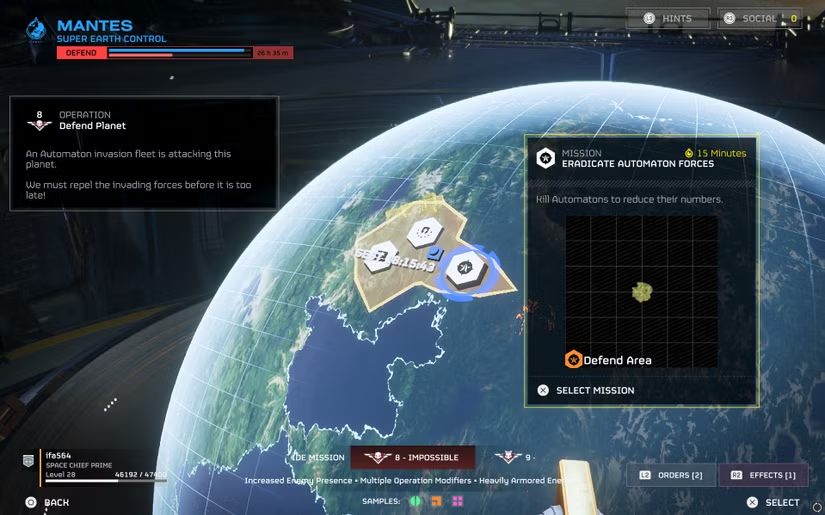
Automaton Defense missions are one of the most efficient ways to acquire Medals and Experience Points in “Helldivers 2.” The core objective of these missions is to eliminate a specified number of Automatons within a time limit, usually requiring the defeat of 150 enemies. Unlike Main Operation missions that last up to 40 minutes, Defense missions are designed to be compact and can be completed by skilled teams in 3-12 minutes, providing excellent efficiency for XP gain.
The vertical structure of the mission map is a key feature of Defense missions. Unlike the flat terrain of Annihilation missions, Defense missions often take place within multi-story fortresses or facilities. This design allows you to use the high ground advantage for setting up defenses. Automatons approach from multiple directions via drop pods, and your team can take advantageous positions in advance to establish a crossfire network.
Table: Automaton Defense Mission Difficulty and Reward Comparison
| Difficulty Level | Estimated Completion Time | Experience Point Reward | Medal Reward | Recommended Player Level |
|---|---|---|---|---|
| Challenging | 8-12 minutes | Approx. 400 XP | 3-4 Medals | Level 10-15 |
| Extreme | 5-8 minutes | Approx. 500 XP | 5 Medals | Level 15-20 |
| Helldive | 6-10 minutes | High Reward (250% Bonus) | 7+ Medals | Level 20+ |
Difficulty selection directly impacts rewards. Although Helldive difficulty offers the highest XP multiplier (250%), Extreme difficulty might be more efficient in terms of time. For players new to Defense missions, it is recommended to start at “Challenging” difficulty to familiarize themselves with the mechanics before attempting higher difficulties.
Equipment Configuration and Stratagem Selection
Successful Automaton Defense missions rely on a carefully planned equipment configuration. Sentry Stratagems are the core of defense missions, automatically attacking enemies within range and greatly reducing team pressure. The most effective combinations include:
- A/M-12 Mortar Sentry: Provides indirect fire, capable of hitting enemies hiding behind cover.
- A/MG-43 Machine Gun Sentry: A highly efficient choice against light Automatons, suitable for placement along enemy approach paths.
- A/AC-8 Autocannon Sentry: Ideal for tackling medium-armored units, effectively piercing Automaton armor.
- A/M-23 EMS Mortar Sentry: Unlocked at Level 20, slows down enemy movement, pairing perfectly with the regular Mortar Sentry.
Personal weapon selection should focus on armor penetration capability. The RS-422 Railgun is a top-tier choice for dealing with heavy-armored units (like Hulks and Tanks), but requires mastery of the unsafe mode—hold the reload button to switch to unsafe mode, and release the trigger before the charge peaks to maximize damage while avoiding an overload explosion. The AR-23P Liberator Penetrator assault rifle is an excellent primary weapon choice, featuring medium armor penetration, highly effective against Berserkers and Devastators.
Teamwork and Tactical Execution
A full four-person squad is the ideal configuration for high-difficulty Defense missions. Team members should have clear roles: one player responsible for deploying and protecting Sentries, another focusing on anti-armor tasks, a third managing team resupply, and the fourth providing mobile support to weak spots.
Sentry placement is crucial. Sentries should be placed in positions where enemy fire cannot directly target them, such as inside the fortress or behind cover, while ensuring they have a sufficient firing arc to cover enemy approach paths. Avoid clustering the Sentries; a dispersed layout covers a wider area and prevents them from being destroyed by a single explosion.
Specific enemy threats require targeted strategies:
- Devastator: Use the Railgun or Anti-Tank weapons to target the gaps in their armor.
- Hulk: The Railgun’s unsafe mode can inflict heavy damage, or use the Orbital Railcannon Strike Stratagem for a one-shot kill.
- Tank: The Orbital Railcannon Strike Stratagem is the preferred choice, automatically locking onto and eliminating the biggest threat.
The mission execution process can be standardized: Drop → Immediately deploy Sentries → Establish a defensive formation → Clear the first wave of enemies → Adjust defense positions for subsequent waves → Quickly extract upon objective completion. Time management is key; avoid over-chasing optional objectives and focus on the primary task to maximize efficiency.
Advanced Tips and Notes
Utilize Airstrikes and Orbital Stratagems for emergencies. The Eagle Cluster Bomb is effective for clearing groups of light Automatons, while the Orbital Laser is a reliable choice for heavy-armored units. These Stratagems have relatively long cooldowns and should be reserved for critical waves or emergencies.
Successfully extracting all squad members provides an additional experience bonus. Even if the mission objective is completed, the team will lose some experience points if they fail to extract. Therefore, as the mission nears completion, start planning the extraction route and strategy.
Communication is the key to team success. Use voice chat or the in-game marking system to coordinate actions, especially when dealing with high-priority targets. One player marks a specific enemy, and others concentrate fire for a swift elimination; this simple coordination can greatly boost efficiency.
Maximizing Experience Gain
In “Helldivers 2,” Side Objectives are one of the key ways to boost your level. These missions appear as blue icons on the map and are categorized into Allied Tactical Objectives and Enemy Tactical Objectives. Although a single Side Objective provides less experience than the Main Objective, they can usually be completed in a short time, and the cumulative XP gain is substantial, offering additional Rare Samples and currency rewards.
Side Objective Types and Value
Side Objectives are mainly divided into two types: Allied Tactical Objectives (e.g., activating a Radar Station, SEAF Artillery) which provide tactical advantages to your team upon completion; and Enemy Tactical Objectives (e.g., Spore Spewer, Stratagem Jammer) which pose a continuous threat to players until destroyed. These missions are not only a source of experience but also provide Super Samples (pink) and Rare Samples.
Table: Overview of Main Side Objective Types and Rewards
| Mission Type | Faction Affiliation | Main Reward | Completion Difficulty |
|---|---|---|---|
| Radar Station | General | Reveals all Points of Interest on the map | Easy |
| SEAF SAM Site | Automaton | Automatically shoots down enemy dropships | Medium |
| Spore Spewer | Terminid | Rare Samples, Experience Points | Easy |
| Stratagem Jammer | Automaton | Experience Points, Resources | Hard |
| Stalker Nest | Terminid | Experience Points, prevents Stalker generation | Medium |
Tips for Finding and Completing Side Objectives
Efficiently finding Side Objectives requires mastering map exploration techniques. Although you may only see one Side Objective marked when starting from the ship, by exploring the map or activating the Radar Station, you can reveal all hidden Side Objectives. The Radar Station itself is a Side Objective, and activating it displays all Points of Interest, including other Side Objective locations, so prioritizing the Radar Station mission can greatly increase efficiency.
For specific missions against the Terminid faction, such as the Spore Spewer, these large mushroom-like structures release spores that reduce visibility. You can find their location via map markers (mushroom-shaped icon) and destroy them with any weapon or Stratagem. Stalker Nests look like ordinary bug holes but do not appear as red markers on the map. By observing the direction Stalkers are coming from, you can find and seal these nests with grenades or explosives to prevent the continuous generation of these cloaked threats.
Side Objectives against the Automaton faction are more complex. Detector Towers are tall structures that emit threatening alarms and call in reinforcements, requiring the use of the Hellbomb or precise Stratagems for destruction. The Stratagem Jammer disables all Stratagems within its radius, including Reinforcements and Resupplies, and must be dealt with first.
Teamwork and Time Management Strategy
A four-person squad is the most effective configuration for completing Side Objectives. The ideal division of labor is two pairs: one group focuses on the Main Objective, and the other specializes in clearing Side Objectives. This division maximizes efficiency, ensuring all available XP objectives are completed within the 40-minute mission time limit.
Time management is crucial. At higher difficulties, enemies are denser, so the priority should be completing the Main Objective first, then tackling Side Objectives. If time is short, selectively complete those Side Objectives that offer better rewards or are more conveniently located. Generally, a 40-minute mission will contain three Side Objectives, and a well-planned route allows for the completion of all of them.
Communication is the key to team success. Use the marking system to indicate Side Objective locations and high-priority targets that need to be dealt with. If the squad splits up, ensure each pair has the capability to handle sudden enemy encounters, especially against Automatons where their long-range firepower is dangerous.
Advanced Tips and Notes
Sample collection should be combined with Side Objectives. While completing Side Objectives, pay attention to collecting nearby Samples, especially Rare Samples. However, be aware that collected Samples are lost if the mission fails or extraction is not successful, so risk and reward must be balanced.
Difficulty selection affects the rewards from Side Objectives. Higher difficulties not only provide an XP bonus but also increase the number and complexity of Side Objectives on the map. As difficulty increases, more challenging Side Objectives like Artillery Turrets and Automaton Tank Turrets will appear.
Stratagem selection should be adjusted based on the mission type. For Side Objectives that require building destruction, bringing explosive Stratagems like Hellbomb, Orbital Strike, or Eagle Airstrike is very useful. For missions that require defending a position, Sentries and Machine Gun Turrets can provide necessary fire support.
Full Squad Operations Guide
In “Helldivers 2,” forming a full four-person squad is one of the most effective ways to accelerate leveling. Compared to solo play, a full team can complete missions faster and also tackle higher difficulty missions, thereby gaining a significant bonus in experience rewards.
Squad Experience Gain Mechanism
Mission reward experience is calculated based on overall team performance, not individual contribution. This means that regardless of how many enemies each player kills or how many sub-objectives they complete, all surviving and successfully extracting players receive the same experience reward.
The number of successfully extracting players directly affects the experience reward. For each additional player who successfully extracts, the entire team receives an extra experience bonus. Therefore, ensuring the entire squad extracts safely is not just about mission success but directly related to everyone’s XP gain. In high-difficulty missions, coordinating the extraction strategy is often more important than quickly completing the primary objective.
Table: Squad Size and Mission Efficiency Comparison
| Squad Size | Average Mission Completion Time | Highest Feasible Difficulty | Experience Gain Efficiency |
|---|---|---|---|
| Solo | 15-25 minutes | Medium or Challenging Difficulty | Base Value |
| Two-Person | 12-20 minutes | Extreme Difficulty | 30-50% Increase |
| Four-Person Full Squad | 8-15 minutes | Helldive Difficulty | 100-150% Increase |
Stratagem Synergy
One of the biggest advantages of squad operation is the synergistic combination of Stratagems. A four-person squad can bring up to 16 different Stratagems (4 per person), creating powerful synergy. For example, a balanced squad might include:
- One player specializing in anti-armor (carrying Recoilless Rifle, etc.)
- One player specializing in area control (carrying Mortar Sentry, etc.)
- One player specializing in resupply (carrying Supply Pack, etc.)
- One player specializing in mobile support (carrying Airstrike Stratagems, etc.)
Strategic deployment of Sentries can greatly enhance squad efficiency. When all four players deploy their respective Sentries (e.g., Machine Gun Sentry, Mortar Sentry), they can form a crossfire network, automatically clearing large numbers of common enemies, allowing squad members to focus on high-value targets and objectives. However, be mindful of Sentry placement to avoid friendly fire and ensure coverage of different directions.
Specialized roles enable the squad to counter various threats. For instance, facing Terminid Bile Titans or Automaton heavy units, having a player specifically responsible for anti-armor using a Railgun or Recoilless Rifle is more efficient. If the Recoilless Rifle is used by one player and reloaded by another, the reload time is drastically reduced from 5 seconds to 0.5 seconds, allowing for highly efficient strikes.
Communication and Division of Labor Strategy
Effective communication is key to squad success. The in-game marking system and voice chat (despite voice prompts being in English) are crucial for indicating objectives, warning of enemy positions, or requesting support. Even without voice chat, proficient use of the marking system allows for basic coordination.
Role division can be flexibly adjusted based on mission type. For missions requiring multiple objectives to be completed, the squad can split into two two-person teams: one focusing on the Main Objective, the other tackling Side Objectives or clearing enemy strongholds. This division of labor significantly boosts mission efficiency, allowing for more content to be completed within the 40-minute mission time limit.
The reinforcement and support mechanism is a core advantage of team play. Downed players can be quickly reinforced by teammates without consuming a limited reinforcement budget. Experienced teams designate one player mainly responsible for rescue, with others providing covering fire. Compared to solo play, the margin for error in team play is significantly higher.
Advantages of High-Difficulty Missions
A full squad can challenge higher difficulty missions, and higher difficulty directly translates to higher XP multipliers. For example, Helldive difficulty offers a 250% XP bonus, but usually requires four players to complete reliably. Solo players struggle to cope with the enemy count and intensity at this difficulty level.
Annihilation missions are especially suited for team speed-runs. These missions have a single objective (eliminate a specified number of enemies), and a four-person squad with numerous Sentries can complete them in 5-12 minutes, even on Helldive difficulty. This high-efficiency mission completion speed makes Annihilation missions the preferred choice for fast XP gain.
Specific Teamwork Techniques
- Drop Strategy: The squad should plan their drop point, avoiding excessive dispersion, and ideally capturing high ground or an easily defensible position.
- Resource Management: Centralize supply allocation, ensuring priority access to ammo for users of critical Stratagems (like anti-tank weapons).
- Threat Prioritization: Use the marking system to focus fire on high-threat targets, suchs as Bile Titans or heavy-armored units.
- Extraction Coordination: Plan the extraction sequence in advance, ensuring severely injured players extract first, with high-firepower players covering the rear.