Nachrichten&Führer
Best Single Player Tips In Helldivers 2

Solo Guide
Comprehensive Difficulty System Analysis
The nine difficulty levels in the game can be roughly divided into three tiers: Beginner (Trivial, Easy, Medium), Intermediate (Challenging, Hard, Extreme), and Advanced (Suicide Mission, Impossible, Helldive). As the difficulty increases, changes are not limited to enemy health and damage; they also include enemy type composition, map resource distribution, and mission time pressure.
At Medium difficulty and above, the game starts generating heavy armored units, enemies that require specific weapons or strategies to deal with effectively. For example, Chargers in the Terminid faction and Hulks in the Automaton faction can easily overwhelm an unprepared solo player. At higher difficulties, enemies appear in more complex combinations—you might face coordinated attacks from ranged units, melee assault units, and enemies with special abilities simultaneously.
Table: Key Characteristics Comparison of Each Difficulty Level
Difficulty Differences Between Solo and Squad Play
Solo play is actually more challenging than team play at the same difficulty. The game difficulty does not adjust based on the number of players, meaning solo players must handle the quantity and quality of enemies originally designed for a four-person squad alone. More importantly, solo players have limited Reinforce uses, and once depleted, the mission fails directly.
The experience gain mechanism is also different: solo players receive less experience upon extraction, as experience rewards are related to the number of successfully extracted squad members. This means solo players need to complete missions more efficiently to achieve progress comparable to team play.
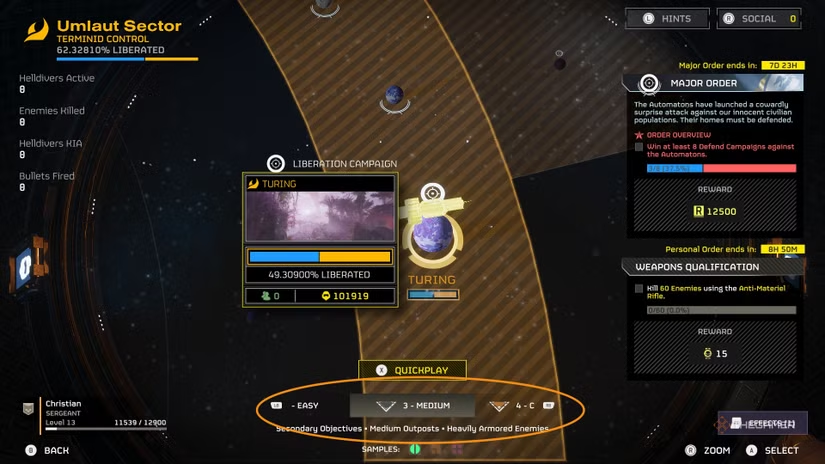
Difficulty Selection Strategy
For players new to solo play, starting at “Easy” difficulty is the optimal choice. Even if you are already familiar with higher difficulties in team play, solo play requires a different set of skills—especially self-survival and multitasking abilities. Mastering these fundamental skills at low difficulty is more effective than repeatedly failing at higher difficulties.
How to determine if you should increase the difficulty? A practical indicator is: if you can successfully extract from three consecutive missions at the current difficulty, and feel well-resourced with moderate challenge, you can attempt the next difficulty level.
Mission type selection is closely linked to difficulty. Some missions are inherently more suitable for solo players, regardless of difficulty. For example, “Terminate Illegal Broadcast” and “Upload Escape Pod Data” missions can be completed quickly, making them suitable for low to medium difficulty solo play. In contrast, “Clear out the Hatchery” and “Blitz” missions require dealing with a large number of enemies, posing a significant challenge even for experienced solo players.
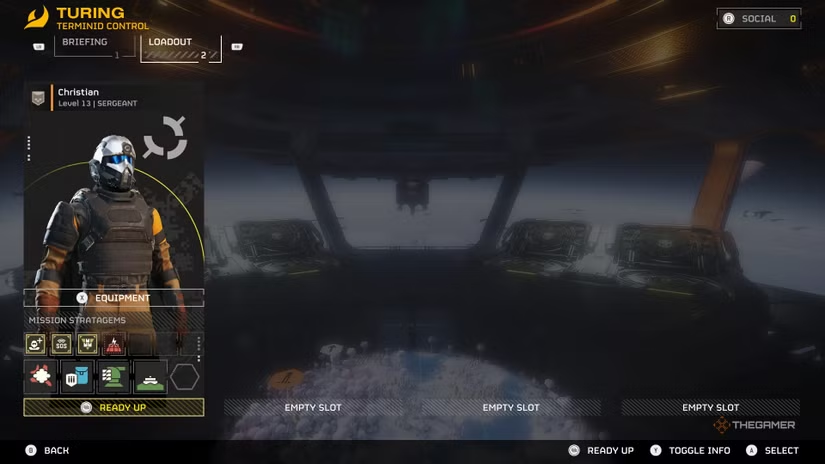
Gear and Stratagem Adjustment
Different difficulties require completely different gear configurations. At low difficulties, general-purpose gear might suffice, but at high difficulties, specialized configurations are crucial. For example, high-difficulty missions against the Automaton faction require stronger anti-armor capability, while fighting Terminids needs more crowd control methods.
Stratagem selection should compensate for the solo player’s weaknesses. Since there are no teammates to provide fire support or revival, solo players should prioritize the following types of Stratagems:
- Automated Defense Systems: Machine Gun Sentry or Gatling Sentry can provide extra firepower
- Survival Tools: Shield Generator Pack can significantly boost survivability
- Flexible Offensive Options: Eagle Airstrike and Orbital Precision Strike can deal with various threats
Light or Medium armor is usually a better choice for solo players. Although heavy armor provides more protection, the movement speed penalty can make it difficult for a solo player to disengage from dangerous situations. Speed
Advanced Solo Gameplay Techniques for High Difficulties
At Extreme difficulty and above, stealth becomes an important survival tool. Utilizing the Light Armor’s “Scout” passive skill can reduce enemy detection range, allowing you to avoid unnecessary battles. Not every enemy needs to be eliminated—sometimes taking a detour or running away is the wiser choice.
Resource management is even more crucial at high difficulties. Every shot and every Stratagem use must be considered in terms of opportunity cost. For example, the Railgun is an excellent anti-armor choice, but requires precise shooting and ammo management. Supply Packs should be placed in safe locations to ensure secure access when needed.
Controlling the pace of combat is an advanced technique. Don’t be led by the enemy; actively choose the engagement location and time. Use terrain advantage, such as narrow corridors or high ground, to limit the number of enemies attacking simultaneously. Remember, your goal is to complete the mission, not to kill every enemy.
From Automated Sentry to Survival Gear
Automated Sentry System: Your All-Weather Firepower Partner
The Gatling Sentry offers fast targeting and continuous fire, making it ideal for dealing with sudden small swarms of Terminids or Automaton patrols. Deployment should be on high ground or in open areas to ensure a good field of fire. The Mortar Sentry can hit targets out of sight, making it suitable for defense missions or complex terrain, but be cautious of its parabolic trajectory causing friendly fire to yourself.
The Autocannon Sentry is the ideal choice for engaging medium armored units, but its ammunition is limited, so it’s best saved for heavy armored enemies. When you need to focus on the main objective, deploying these Sentries on the approach path can buy you valuable time. Important tip: standing above or near the Sentry is safe, as they will not accidentally shoot the user.
Table: Comparison of Main Automated Sentry Systems and Applicable Scenarios
Shields and Survival Gear: Your Mobile Fortification
In solo play, survivability is directly related to mission success. The Shield Generator Pack is an excellent choice; it generates an energy shield that blocks Automaton lasers and Terminid melee attacks. Even if the shield is destroyed, it will reactivate after a brief period of avoiding damage.
The “Guard Dog” Rover drone is another indispensable partner, especially with its 360-degree firing capability, which protects your back while you focus on enemies in front. But be aware that its automatic attack feature might compromise your stealth attempts; you may need to temporarily disable it if you choose a stealth approach. For solo players, Light or Medium armor is usually more practical than heavy armor because it provides better mobility, allowing you to quickly reposition.
Tactical and Retreat Stratagems: Controlling the Battlefield Tempo
Not all defense is about holding the ground. Sometimes, strategic retreat is the best choice. Eagle Smoke Airstrike and Orbital Smoke Strike can effectively block enemy line of sight, allowing you to disengage or sneak past dangerous areas. The Jump Pack is another mobility solution that enables you to quickly reach advantageous positions or escape encirclement.
The Anti-Personnel Minefield is an excellent tool for area denial. Deploy them on predictable enemy approach paths, especially near Bug Holes or Automaton drop zones. When you hear the mines explode, you know a portion of the enemy force has been dealt with. Smart Minefield placement allows you to focus on enemies from one direction without worrying about flank attacks.
Ship Module Upgrades: Enhancing Your Stratagems
Do not overlook the Module Upgrades in the Ship Management terminal. For example, the Engineering Bay’s “Advanced Construction” module increases Sentry durability, and the Robotics Workshop’s “Impact Dampening Gel” module increases Sentry ammunition capacity. These upgrades can significantly enhance the longevity of your defensive assets.
Prioritize upgrades related to your most frequently used Stratagems. If you rely on Sentries for defense, investing in Robotics Workshop upgrades is wise. Similarly, if you prefer Airstrike Stratagems, focus on Bridge-related upgrades to reduce call-in time.
Gear Selection for Different Enemies
Against Terminids, crowd control is key. Prioritize gear that can handle large numbers of small enemies, such as the Mortar Sentry and explosive weapons. For Automatons, precision strikes and anti-armor capability are more important, as their units are typically tougher and have ranged attack capabilities.
Adjust your loadout based on the mission type. For defense missions, a combination of multiple Sentry types is highly effective. For mobile missions, the Shield Generator Pack and Jump Pack may be more valuable. Always consider whether your Stratagems can address the most likely threats in the mission.
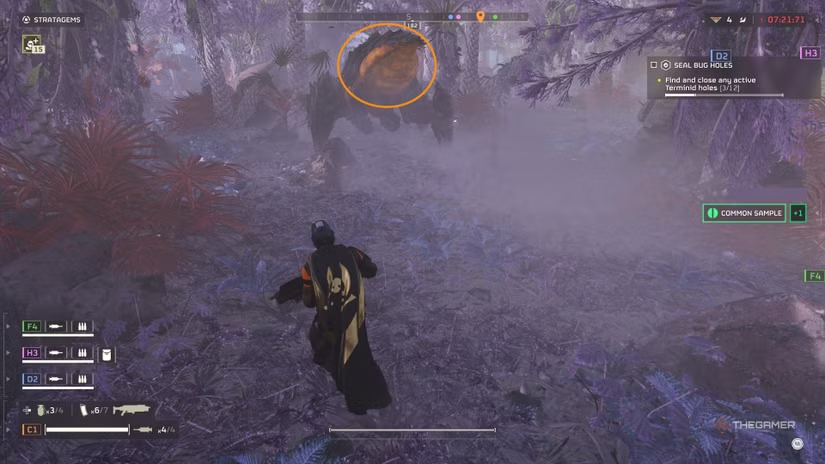
Solo Mode Patrol Engagement
In Höllentaucher 2 solo play, patrols are one of the most frequent and dangerous threats you will encounter. These small groups of enemies moving across the map may seem insignificant, but they can quickly call in reinforcements, turning your mission into a survival nightmare. For a solo player without teammate support, mastering patrol engagement techniques is directly related to mission success.
Patrol Identification and Behavior Patterns
Patrols are usually composed of 2-5 enemies, moving along fixed paths in areas away from enemy nests. Unlike enemies guarding specific positions, patrols actively search for targets, and once they spot you, they will immediately raise the alarm and call in reinforcements. Automaton patrols typically launch a red flare, while Terminids summon companions with specific vocalizations.
The mini-map is an essential tool for identifying patrol locations. Red markers and movement trajectories displayed on the map help you plan your route in advance and avoid these potential threats. Patrols are usually more active around objective points.
Evasion Strategy: Stealth Over Direct Confrontation
For solo players, avoiding combat is often wiser than winning the fight. Choosing Light Armor with the “Scout” passive skill can significantly reduce enemy detection range, giving you more maneuvering space. Maintaining distance and using environmental cover are fundamental techniques for evading patrols—rocks, buildings, and terrain variations all offer concealment.
When planning your route, try to avoid open areas, choosing paths with natural cover. If you must cross an open area, wait for the patrol to move away from you and pass quickly. Exploit the fixed path patterns of patrols by observing their movement before choosing the best time to cross.
When a patrol is about to spot you, immediately throw a Stratagem or make a noise to divert their attention. An Eagle Airstrike or an explosive can draw the patrol’s attention from a distance, creating a window for you to pass. Remember, your primary goal is to complete the mission, not to eliminate every enemy you see.
Quick Elimination Tactics
When engagement is unavoidable, speed is key. Use the GL-21 Grenade Launcher or the LAS-16 Sickle to quickly clear small patrol groups before they can call in reinforcements. Ideally, you should strike first before the patrol spots you.
Prioritize eliminating special units in the patrol, such as the Scout that can call in reinforcements or enemies with long-range attack capability. Using the “Guard Dog” backpack or a Sentry turret can automatically attack approaching patrols, giving you more reaction time. But note that these automated weapons may expose your position, so use them with caution.
If a patrol has already called in reinforcements, immediately assess the situation and decide whether to retreat. A solo player struggles to cope with a large-scale enemy siege, so a strategic retreat is often wiser than persisting in the fight. Use smoke grenades or the Jump Pack to quickly disengage and reorganize your tactics.
Integrating Patrols into Mission Strategy
Different mission types require different patrol engagement strategies. In stealth missions, complete avoidance may be the best choice; in defensive missions, controlled small-scale engagement may help divert enemy attention.
Incorporate patrols into your tactical planning. Sometimes you can intentionally provoke a small fight, luring the patrol away from the main objective area, creating a window for you to execute the primary mission. For example, before approaching the main objective, you can trigger a patrol alarm at a safe distance, making the reinforcements they summon appear at a predetermined combat location.
Use the environment against patrols. Lure patrols into minefields or dangerous terrain, letting the environment become your ally. Certain environmental hazards on the map can help you quickly dispatch patrols, reducing resource consumption.
Advanced Techniques and Risk Management
Learn to identify the composition of patrols at different difficulties. In high-difficulty missions, patrols may include more powerful enemy types, requiring corresponding adjustments to your engagement strategy. As difficulty increases, the patrol’s detection range and reaction speed also increase, meaning your stealth strategy needs to be more refined.
Establish a tiered response system: the first tier is complete evasion, the second is quick elimination, and the third is tactical retreat. Decide which tier to adopt based on your gear status, mission progress, and surrounding environment. For example, when you are close to mission completion and well-resourced, you might choose quick elimination; but when you’ve just been through a tough fight and are low on ammo, evasion might be the better choice.
Always reserve an escape route for yourself. Before engaging a patrol, confirm the nearest cover position and retreat path. Solo players have no teammate support and must rely on their understanding of the terrain and quick decision-making ability.
From Basic Movement to Tactical Extraction
In Höllentaucher 2 solo play, maintaining mobility is not just a tactical choice; it’s an essential survival skill. When you have no teammates to provide fire support or revival, flexible positioning and sustained battlefield maneuverability directly determine mission success or failure.
The Tactical Value and Physical Mechanics of Movement
The core value of movement lies in breaking the enemy’s encirclement and attack rhythm. The enemy AI in the game usually relies on preset paths and attack patterns, and continuous movement disrupts this regularity, forcing enemies to constantly reposition, creating opportunities for you to counterattack or retreat. Especially against melee-focused enemies like Terminids, movement directly avoids the danger of being encircled at close range.
The stamina system is the core limitation of movement capability. The stamina bar in the center of the screen determines your sustained movement ability—a full stamina bar allows you to sprint for about 8-10 seconds, after which it needs recovery. Wise stamina management means actively stopping sprinting when the stamina bar is nearly depleted, allowing it to recover quickly, rather than being forced to walk slowly after it’s completely exhausted. Experienced players adopt a “pulse sprint” strategy: sprint for 3-4 seconds, walk for 1-2 seconds to recover some stamina, and then continue sprinting.
Table: Impact of Different Armor Types on Mobility
Gear Selection and Stamina Optimization
Light or Medium armor is the preferred choice for solo mobile combat. Although heavy armor offers more protection, the movement speed penalty can prevent you from disengaging from dangerous areas in time. Choosing Light Armor with the “Scout” passive can further reduce enemy detection range, achieving true “hit-and-run” tactics with high movement speed.
Booster selection can significantly enhance mobility. The “Stamina Enhancement” Booster increases sprint duration by 30% and accelerates stamina recovery, making it ideal for long-distance transfers. The “Muscle Enhancement” Booster allows you to cross difficult terrain (such as snow, mud) easily, reducing movement hindrance.
The Jump Pack (LIFT-850 Jump Pack) provides vertical mobility, allowing you to quickly reach high ground or cross obstacles, fundamentally changing the way you move. When encircled by enemies, a simple jump can break contact and regain the tactical initiative.
Practical Movement and Engagement Strategies
Movement is not blind running; it’s purposeful displacement. In engagement, movement should serve specific tactical objectives: approaching the mission objective, retreating from dangerous areas, or repositioning for a better firing angle. Avoiding attrition warfare is the core principle of mobile tactics—if a fight lasts longer than 30 seconds with no clear progress, consider disengaging.
Engagement techniques while moving include the “shoot-move-shoot” pattern: open fire during a brief pause, then immediately move position to avoid becoming a stationary target. Against Terminids, shooting while retreating maintains a safe distance; against Automatons, side-strafing effectively dodges their linear attacks.
Diving (Prone) is an important movement technique. Immediately pressing the sprint key after diving allows for a quick stand-up, which is a crucial maneuver for breaking contact when enemies are nearby. Diving from high ground to low ground quickly increases distance, but be careful to avoid the momentary stun from the fall.
Terrain Utilization and Route Planning
The mini-map is a key tool for movement planning. Continuously checking the map allows you to identify patrol locations, plan routes to bypass enemies, and mark resource points and points of interest. The ideal movement route should utilize natural cover (rocks, buildings, terrain variations), avoid open ground, and reserve alternate routes for unexpected situations.
High-ground advantage cannot be ignored. Occupying high ground not only provides better visibility but also slows down the enemy’s approach. Slopes and ridges are ideal movement paths because they offer natural cover while allowing you to observe your surroundings.
Identifying environmental hazards includes avoiding water (Helldivers cannot swim and will die upon entering deep water), staying away from minefields, and being mindful of map boundaries (lingering too long will lead to mission failure).
Resource Management and Mission Priority while Moving
Supply strategy should be integrated with the movement route. Set up supply points en route to the objective, rather than at the center of the objective area. This allows you to replenish resources after completing a mission stage, instead of scrambling for supplies when you need them.
Mission priority determines the movement tempo. The main objective should be completed first, and secondary objectives should only be attempted when time is abundant. The 40-minute mission timer sounds long, but careful time allocation is crucial: the first 25 minutes should focus on the main objective, and the remaining time should be used to decide whether to explore secondary objectives based on resource status.
Timing the extraction is the final test of movement strategy. Remember, the extraction shuttle takes about 2 minutes and 30 seconds to arrive and stay; you only need to approach the landing zone as the ship descends, avoiding premature exposure at the extraction point.
Advanced Movement Techniques and Risk Management
Strategic retreat is an advanced movement technique. When facing powerful enemies like Bile Titans or multiple heavy armored units, an organized retreat is more effective than a blind assault. Adopt a “mobile defense” strategy: deploy Sentry turrets or mines along the retreat path, gradually falling back while depleting the enemy’s numbers.
Luring and misdirection tactics can create movement opportunities. For example, throwing an explosive in one direction to draw enemy attention, then moving in the opposite direction. Against Terminids, you can exploit their inter-species attack mechanics—lure a Charger to ram a Bile Titan, making them fight each other.
Communication and marking while moving are important even in solo play. Use the in-game marking system to indicate planned routes, dangerous areas, or resource points.
From Identification to Efficient Elimination
In Höllentaucher 2, understanding enemy weaknesses is key to survival, especially for solo players, as precise weak point targeting can conserve valuable ammunition and quickly neutralize threats. The two major enemy factions in the game—Terminids and Automatons—each have unique weak points and engagement strategies.
Comprehensive Terminid Enemy Weakness Analysis
Terminid enemies primarily rely on numbers and melee attacks, and targeting their weak points is effective for controlling the battle. Low-tier Terminids like Scavengers and Warriors have low health but are numerous, requiring quick clearance to prevent them from calling in reinforcements. The head is the main weak point of these small bugs; using a shotgun or submachine gun can quickly deal with clustered small units.
Medium-threat Terminids include Stalkers and Hunters, which are more agile and dangerous. Stalkers can be semi-invisible and perform ambushes; flame damage is particularly effective against them. Once a Stalker Lair is found, prioritize destroying it to prevent infinite respawning.
High-tier Terminids are the main challenge for solo players. Bile Spewers come in two variants: the yellow variant has higher damage, and the green variant has a slowing effect and a mortar mode. Counter-intuitively, their weak point is not the seemingly vulnerable abdomen, but the small head. Aiming for the head or using impact grenades can quickly dispatch them.
Chargers are heavy armored units appearing from medium difficulty, and their weak point lies in the unarmored leg area. After using a Railgun or anti-tank weapon to strip the leg armor, you can attack the exposed soft tissue with conventional weapons. The Bile Titan, as the most powerful Terminid unit, despite its large size, has its head and abdomen as its main weak points. Using a Railgun to aim for its head, or attacking its mouth when it spits acid, can deal fatal damage.
Table: Main Terminid Enemy Weaknesses and Engagement Strategies
Comprehensive Automaton Enemy Weakness Analysis
The Automaton faction is characterized by ranged attacks and armored protection, and targeting their weak points requires more precise aiming and strategy. Basic units like Troopers, Raiders, and Marauders all have an exposed head weak point; a precise headshot can quickly eliminate them. Although these units pose little threat individually, they create fire suppression when numerous.
Berserkers are the Automaton melee specialists, quickly approaching players with dual chainsaws. Their weak points are the head and the glowing waist area; a sniper rifle or a few shots aimed at the head can eliminate them. The key is to maintain distance and avoid close quarters.
Devastators are the backbone of the Automaton faction, with various variants including basic, shield, and rocket types. Rocket Devastators are especially dangerous, capable of a fatal shot from a distance. Their weak point is the head, but the extra armor plating makes aiming difficult. Another strategy is to shoot the missile pod on their back, which can be detonated with explosive weapons like the Railgun or Autocannon for massive damage.
Hulks are the heavy units of the Automaton faction, analogous to the Terminid Charger. They have an exposed thermal exhaust port on their back, which is the main weak point. Since the front armor is extremely thick, conventional weapons are ineffective, requiring flanking maneuvers or the use of armor-piercing weapons like the Railgun. Tanks are a higher-level threat, with only the glowing part on the rear of the turret being a weak point. The best strategy is to use the Orbital Railcannon Strike Stratagem, which can be a one-hit kill, or coordinate with teammates, one drawing fire and the other flanking to attack the weak point.
Efficient Engagement Strategies and Weapon Selection
After understanding the weak points, choosing the right weapon is crucial. For Terminids, area-of-effect weapons like the Flamethrower and shotguns are effective against clustered small units. For Automatons, more precise striking weapons like sniper rifles and the Railgun are needed.
Stratagem selection should target anticipated high-threat enemies. Orbital Railcannon Strike is effective against Tanks and Hulks, while the Orbital Laser is suitable for dealing with Bile Titans. For medium enemy groups, the Eagle Cluster Bomb provides good area clearance capability.
Solo players need to pay special attention to positioning and movement. When facing heavy armored enemies, use terrain advantage, maintain distance, and aim for weak points. For example, when engaging a Hulk, keep moving and aim for the exhaust port on its back; when dealing with a Charger, first strip the leg armor and then focus fire.
Advanced Techniques and Mission-Specific Strategies
Different mission types require adjusted engagement strategies. In defense missions, Sentry turrets like the Autocannon Sentry and Mortar Sentry provide sustained fire, especially against clustered medium and small enemies. Exploration missions prioritize mobility and precision strike capability.
Use the environment against enemies. Automatons will trigger mines, so they can be lured into a minefield. Similarly, certain environmental hazards can damage enemies; utilizing them wisely can conserve ammunition.
Team coordination for high-priority targets. Although this guide focuses on solo play, understanding team coordination strategies is still valuable. For example, against a Tank, one person draws attention while the other flanks to attack the weak point; or use the EMS Stratagem to slow enemy movement, making weak point targeting easier.