الأخبار والأدلة الإرشادية
كيفية الحصول على ميداليات في هيلديفرز 2

To get Medals in Helldivers 2, focus on completing Daily Personal Orders for 15 Medals each, finish missions (especially on higher difficulties for more rewards), and search for Medal Cases in Points of Interest like crashed ships, containers, and bunkers during missions
Efficient Medal Acquisition
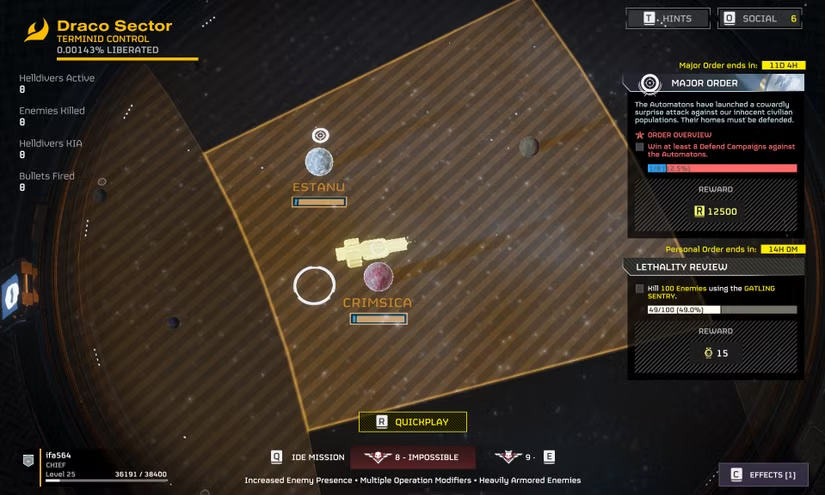
The Daily Personal Order challenges are one of the most stable sources of Medals in “Helldivers 2,” offering a fixed reward of 15 Medals upon completion each day. These challenges refresh daily and are usually designed to be completed within an hour, providing a strong incentive for players to log in daily.
Checking your Daily Order is simple: Press L2 (PlayStation) or the corresponding PC key on your ship to view the current Personal Orders on the right side of the screen. The Galactic War table also provides another way to check, allowing you to know the objective while planning your mission. The most common order types involve eliminating a specific number of enemy units, such as “Eliminate 500 Terminids” or “Eliminate 300 Automatons.”
Table: Common Daily Personal Order Types and Completion Strategies
| Order Type | Typical Objective | Recommended Completion Method | Estimated Time |
|---|---|---|---|
| Eliminate Terminids | Eliminate 500 Terminids | Select Terminid planet Annihilation missions | 20-30 minutes |
| Eliminate Automatons | Eliminate 300 Automatons | Annihilation missions during Automaton Defense Major Orders | 15-25 minutes |
| Specific Weapon Kills | Achieve kills with a specific Stratagem | Pair with Sentry turrets or other automated weapons | Varies by mission |
| Target Destruction | Destroy specific enemy structures | Focus on demolition missions against the corresponding enemy type | 25-35 minutes |
For common elimination orders, Annihilation missions are the best choice. These missions only take 12 minutes to complete and focus on eliminating a specified number of enemies, perfectly aligning with the order requirements. When the Automaton Defense Major Order is active, Annihilation missions appear reliably, which is a golden opportunity to complete related orders. Choosing the appropriate difficulty is also crucial—higher difficulties have more enemies, but you must balance completion efficiency with risk.
For orders requiring the elimination of large numbers of enemies, Sentry Stratagems are particularly effective, as their kills also count towards the order progress. Mortar Sentry, Autocannon Sentry, and EMS Mortar Sentry can automatically clear enemies, allowing you to focus on other objectives. For orders requiring specific weapon kills, adjusting your loadout on the ship beforehand can save significant time during the mission.
Teamwork can significantly speed up order completion. Coordinating with teammates to select the same order objective allows the completion progress to stack. For example, if four players are all pursuing the “Eliminate 500 Terminids” order, each only needs to complete about 125 kills to complete their respective order. Furthermore, combining Personal Orders with ongoing mission objectives maximizes time efficiency, avoiding the need to grind missions solely for the order.
The reward mechanism for Daily Orders is straightforward: 15 Medals are automatically added to your account upon completion, no extra action required. Importantly, even if the mission fails or you fail to extract, the reward is still granted as long as the order requirements are met. However, note that there is a limit on Daily Orders, and you cannot stack multiple days’ worth, so logging in daily to complete the order is key to maintaining a stable Medal income.
Grinding Medals with Annihilation Missions
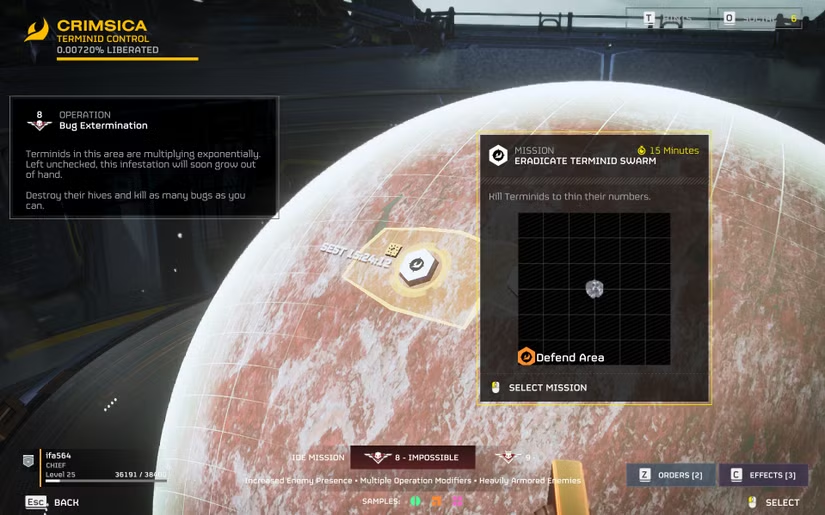
Annihilation missions are one of the most efficient mission types for acquiring Medals in “Helldivers 2,” specifically designed for quick completion and reward acquisition. These missions are available against the Terminid and Automaton factions, with the core objective being to eliminate a specified number of enemies within a 12-minute time limit. Compared to Main Operation missions that last up to 40 minutes, Annihilation missions adopt a small arena-style design, where players defend against enemy waves in a confined area, allowing for continuous engagement without extensive travel.
Mission refresh mechanics follow specific patterns. While usually you need to search for Annihilation missions within operations on different planets, they reliably appear in every relevant operation when a “Automaton Defense Major Order” is active in the Galactic War, marking a golden period for focused Medal grinding. Annihilation missions offer the same rewards as normal missions, but their extremely short completion time significantly increases the number of Medals acquired per unit of time.
Table: Annihilation Mission Rewards and Completion Time Reference by Difficulty
| Difficulty Level | Estimated Medal Reward | Average Completion Time | Recommended Player Level |
|---|---|---|---|
| Simple-Medium | 1-3 Medals | 8-10 minutes | Level 1-10 |
| Challenging | 4-5 Medals | 7-9 minutes | Level 10-15 |
| Extreme | 5-7 Medals | 6-8 minutes | Level 15-20 |
| Helldive | 7+ Medals | 8-12 minutes | Level 20+ |
Sentry Stratagems are core equipment for Annihilation missions, as they automatically attack enemies, greatly reducing player pressure. The Mortar Sentry, in particular, can bombard concentrated enemy areas from a distance, proving highly effective against hordes of smaller enemies. Other recommended Stratagems include: Autocannon Sentry, Machine Gun Sentry, and EMS Mortar, which can form a crossfire network covering all angles of the arena.
Recoilless Rifle and Railgun are significantly effective against heavy armored units. The Railgun’s unsafe mode (activated by holding the reload button) can deal massive damage to heavy armored enemies, but care must be taken to control the charge level to avoid overcharge explosion. For Automaton armored units, the EAT-17 Expendable Anti-tank is a highly cost-effective choice, with a short cooldown and two rounds per drop.
A full four-person squad is the ideal setup, allowing for clear division of labor: one player focuses on shooting, one on resupply, and two on deploying Sentries and Stratagems. Teammates should spread out to cover different directions, avoiding being surrounded by enemies, while maintaining a proper distance for mutual support. Voice communication is crucial, especially for coordinating fire priority against specialized enemies.
Map utilization techniques include: securing high ground for vision advantage, controlling ammo resupply points to ensure sustained fire, and utilizing environmental explosives such as red explosive barrels to instantly eliminate groups of enemies. Pay attention to enemy spawn directions, and set up defenses in advance to avoid being ambushed from multiple directions.
Quick-run strategy suggestion: Deploy Sentry turrets immediately after the mission starts, and the whole team concentrates on clearing the first wave of enemies; in the mid-stage, split into two groups, one to draw fire, and the other for flanking attacks; save powerful Stratagems for elite enemies in the final stage. Successful extraction is not mandatory; as long as the main objective is completed, you will receive the full Medal reward even if all players die.
Combining Annihilation missions with Personal Orders maximizes benefits. For example, if the daily order is “Eliminate 500 Automatons,” selecting an Automaton Annihilation mission advances both the order progress (rewarding an additional 15 Medals upon completion) and the mission reward. During Major Orders, community progress also provides extra Medal rewards, further boosting the value of Annihilation missions.
Hidden Medal Vaults
In “Helldivers 2,” Medals are the key currency for unlocking new weapons, gear, and cosmetics, and wreckage and bunkers scattered across the map are the most important Medal sources outside of mission rewards. Unlike missions with fixed rewards, these hidden spots offer a substantial amount of Medals and are engaging to discover through exploration.
Wreckage
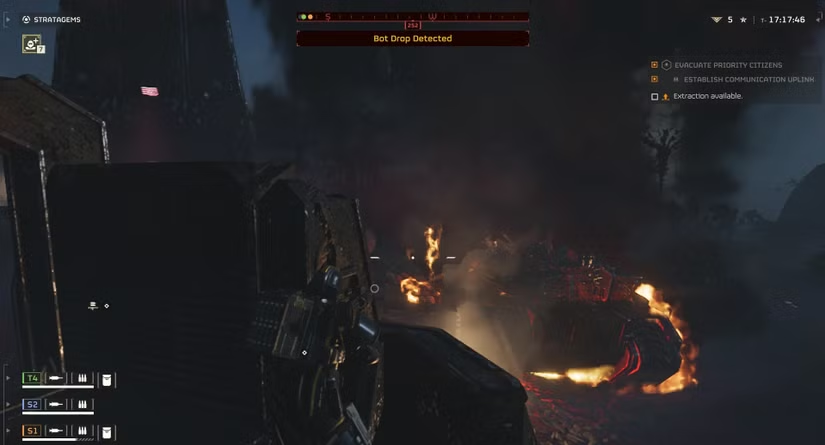
When undertaking Main Operations with a 40-minute time limit, maintaining environmental awareness is crucial. The most obvious sign of a crashed ship is a yellow beam of light shooting into the sky, visible from a great distance. These wrecks are usually patrolled by a small number of minor enemies, and defeating them often reveals an elite or armored enemy. After eliminating the guards, interacting with the ship allows you to loot the internal supplies.
Table: Comparison of Map Point of Interest Types and Rewards
| Point of Interest Type | Main Rewards | Opening Method | Enemy Guard |
|---|---|---|---|
| Ship Wreckage | Medals, Super Credits | Direct Interaction | Few minor enemies + Elite |
| Bunker | Medals, Super Credits, Samples | Two-person Button/Teleport Pack | Occasionally a patrol |
| Container | Medals, Supplies, Super Credits | Explosive Damage | None or few |
The loot inside ship wrecks is randomized and may contain Medals or Super Credits. For this reason, keeping an eye out for these yellow beams during a mission is well worth it. Experienced players suggest a slight detour to explore if a yellow beam is spotted on the way to the main objective.
Bunkers
Bunkers are another important source of Medals, but their opening method is more complex. Traditionally, bunkers require two players to cooperate to open. Bunker doors usually have a blue outline glow, with a button on each side that needs to be pressed simultaneously.
After successfully cooperating to open a bunker, the interior usually contains Medals, Super Credits, or other resources. While a single bunker may only offer 2-3 Medals, multiple bunkers can be scattered across the map, adding up to a significant supplement to your Medal reserve.
The good news is that for solo players or squads struggling to coordinate, there is now an alternative. By unlocking the LIFT-182 Jump Pack from the Control Group Warbond, players can use its teleport function to pass through bunker doors solo. The developers have confirmed this feature is intentional, meaning it can be used as a reliable way for a single player to open bunkers. This completely changes the situation where acquiring bunker rewards was previously dependent on a teammate.
Practical Details and Strategy
- Environmental Utilization: When approaching a wreck or bunker, use the surrounding terrain to observe first, avoiding blindly rushing into enemy groups. High ground usually offers better visibility.
- Enemy Prioritization: Prioritize eliminating enemies that can call for reinforcements to prevent the situation from spiraling out of control.
- Resource Allocation: Squads can split up to explore Points of Interest in different directions, using the marking system to communicate, maximizing search efficiency.
- Risk Assessment: In higher difficulty missions, weigh the time spent exploring extra Points of Interest against the potential for extra conflict. Sometimes, efficiently completing the main objective and extracting safely is wiser than being greedy for extra rewards.
Maximizing Medal Acquisition
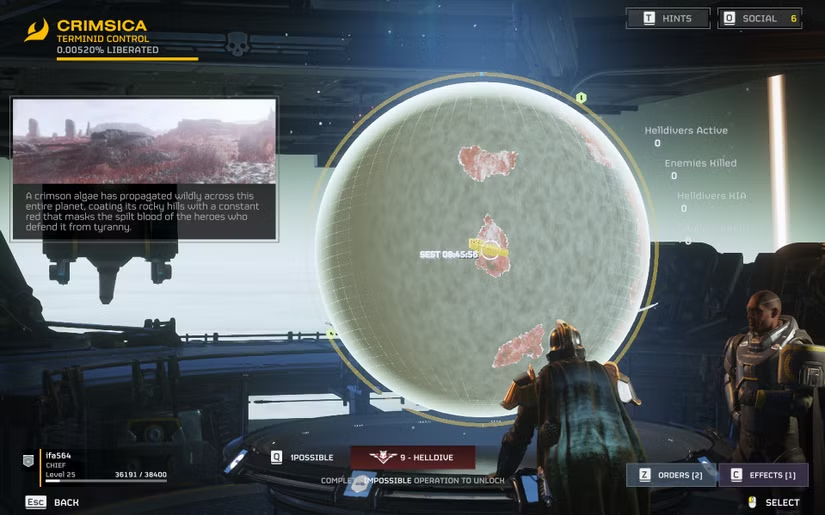
In “Helldivers 2,” completing missions on Helldive difficulty (the highest difficulty, often called N9 or Helldiver difficulty) is one of the most effective ways to acquire Medals. This difficulty level not only tests players’ individual skills but also emphasizes teamwork and tactical planning, yet the rewards are the most generous. Compared to lower difficulty missions, the number of Medals offered at Helldive difficulty is significantly increased, making it the primary path for late-game players to quickly accumulate resources.
Reward Advantage of Helldive Difficulty
At Helldive difficulty, completing the main objectives is key to acquiring Medals. Even if the entire team is wiped out and fails to extract successfully, as long as all main objectives are marked as complete, you still receive the full Medal reward. This means teams can adopt a more aggressive strategy, focusing on objective completion rather than survival.
Mission type directly influences completion efficiency and Medal acquisition speed. Defense missions (such as “Eradicate Automaton Forces” or “Purge the Xenos Threat”) are highly favored due to their clear objectives and concentrated areas. These missions can usually be completed in a relatively short time (around 5-10 minutes) while offering a consistently high Medal reward (around 8 Medals).
Table: Recommended Mission Types and Features for Helldive Difficulty
| Mission Type | Average Completion Time | Medal Reward | Recommended Reason |
|---|---|---|---|
| Defense/Annihilation Missions | 5-10 minutes | Approx. 8 Medals | Focused objectives, high efficiency |
| Main Operation Multi-Missions | 15-25 minutes | Progressive rewards | Successive completion rewards more Medals |
| Other Complex Missions | 15-40 minutes | Varies by mission | Not recommended for quick Medal farming |
Stratagems and Weapon Loadouts
Successfully navigating Helldive difficulty requires careful selection of Stratagems. The Mortar series is core to defense missions, automatically attacking enemies within range and greatly reducing team pressure. Specifically, the A/M-12 Mortar Sentry and the A/M-23 EMS Mortar Sentry (unlocked at Level 20), their combination can effectively control the battlefield.
Weapon choices should focus on dealing with heavy armored units. The Railgun, in unsafe mode, is highly efficient against heavy armor targets but requires precise control of the charge to avoid overcharge explosion. The Recoilless Rifle, on the other hand, requires a teammate for reloading assistance, making it suitable for well-communicating teams.
The following is a recommended gear combination for Helldive difficulty missions:
- Essential Stratagems: A/M-12 Mortar Sentry, A/MLS-4X Rocket Sentry
- Teamwork Stratagems: A/M-23 EMS Mortar Sentry (at least 2 per team), A/AC-8 Autocannon
- Anti-Armor Weapons: Railgun or Recoilless Rifle
- Support Gear: Extra Supply Pack, Shield Generator Pack
Teamwork and Tactical Execution
Communication is the foundation for success at Helldive difficulty. Team members should have clear roles—some responsible for placing and protecting Sentries, others focused on clearing specific threats, and others on completing the main objective. Voice chat is far more effective than the marking system for real-time coordination of sudden situations.
Sentry placement is critical. They should be placed in high-ground positions, but ensured they are not on the direct enemy path. Dispersing Sentries covers a wider area and prevents them from being destroyed by a single explosion. Experienced players deploy some Sentries 1-2 minutes after the fight begins, to serve as a reserve force.
When there are multiple defense points on the map, the team should not over-disperse. Concentrating defense on one area is often more effective than scattered coverage, allowing for quick mutual support. Also, designate one player specifically to protect the Sentries and clear approaching enemies, which significantly extends the operational time of the automated defense system.
Practical Tips and Notes
Balance Sample Collection with Medal Acquisition. At Helldive difficulty, the drop rate for Samples (especially Rare Samples) is higher, but collecting them increases mission risk. The wise approach is to prioritize completing the main objective to secure Medals, and then attempt to collect Samples along the extraction route.
Utilizing terrain advantage is key to survival. Find natural choke points (narrow passages) to set up defenses, restricting enemies from approaching from a single direction. Avoid engaging in open areas, especially against Automatons, whose long-range firepower is extremely threatening in the open.
Extraction strategy needs to be planned in advance. When a Helldive difficulty mission is nearing completion, you should consider the extraction point location and the path to get there. Saving some powerful Stratagems (like the 500kg Bomb or Orbital Railcannon Strike) for clearing enemies around the extraction point can significantly increase the chances of a successful extraction.